


Want to send personalized SMS messages to customers right from Google Sheets? You can do it with a little help from Plivo and this SMS automation power sheet. We used Google Apps Script to create an SMS merge feature for Google Sheets.
To use Plivo’s messaging script, you must have a Plivo account, and an SMS-enabled phone number with which you can send messages to your customers. If you don’t have an SMS-enabled number among the numbers on the Phone Numbers page of the console, click Buy Number to get one.
Create a sheet
Now create a new Google Sheet, then click Tools > Script editor to start a new Apps Script project. Copy the content of the scripts.gs file in our GitHub repository and paste it into work area in place of the empty function that Apps Script starts with.
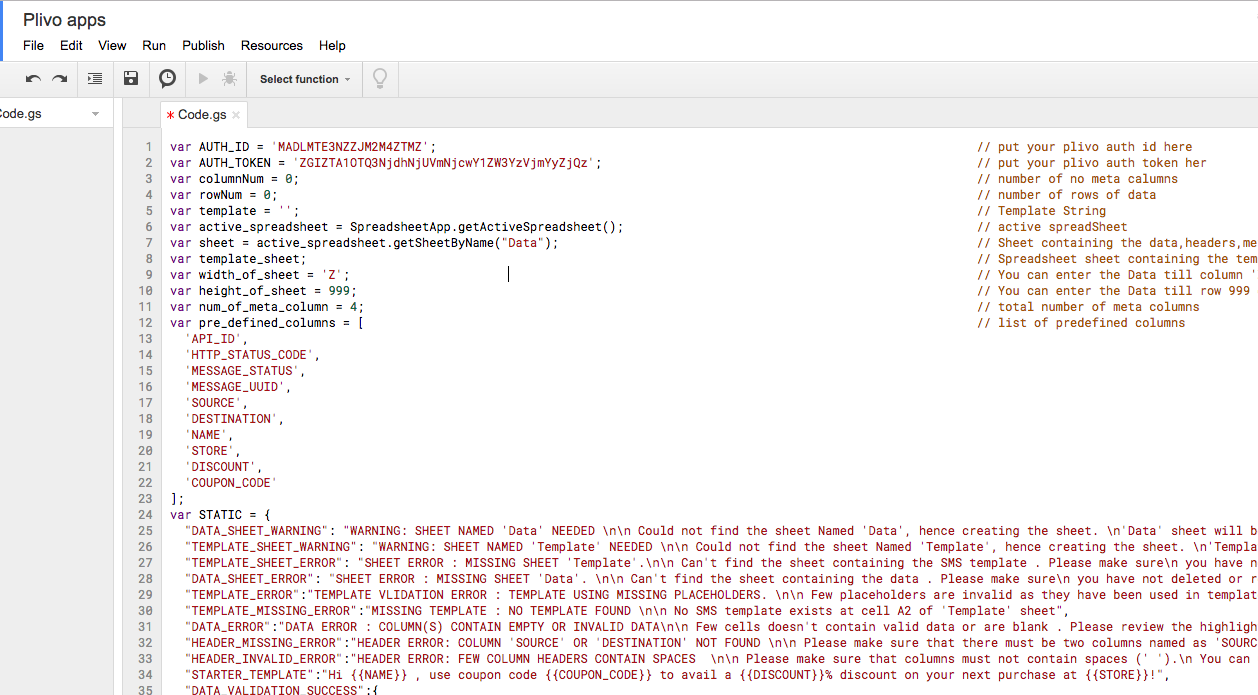
At the top of the file, replace the placeholders XXX.YOUR.AUTH_ID.XXX and XXXXXXXXXXXX.YOUR.AUTH_TOKEN.XXXXXXXXXXX with the Auth ID and Auth Token values for your account, which you can find on the overview page of the Plivo console.
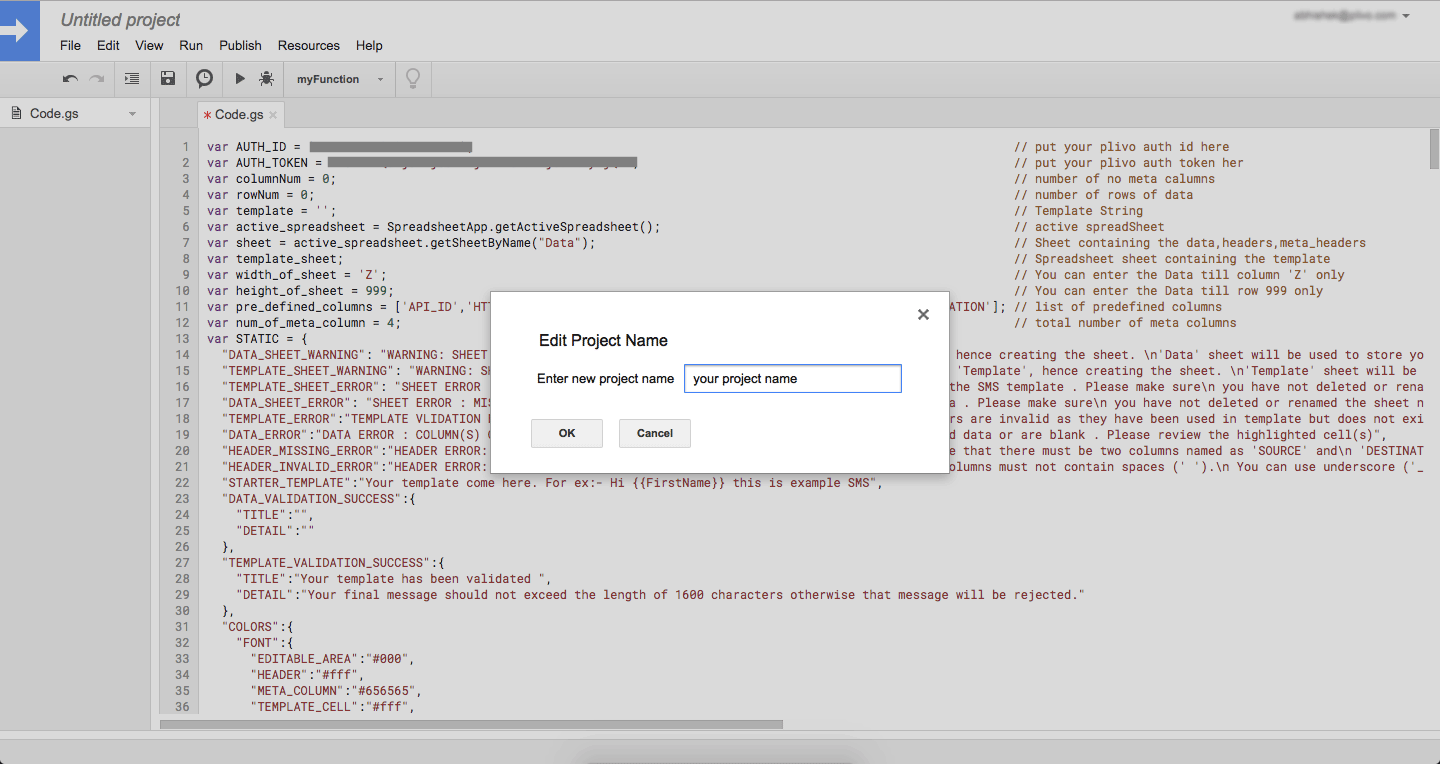
Save the project that contains the Apps Script. Give it any name.
Save the code
Now reload the Google Sheet.
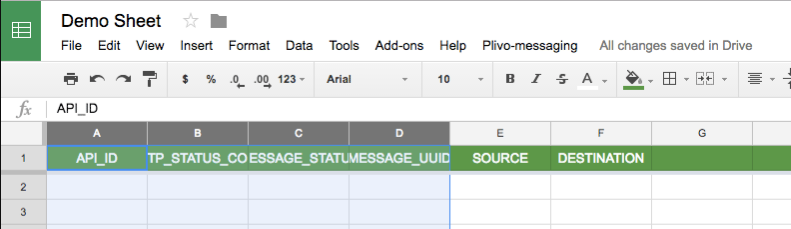
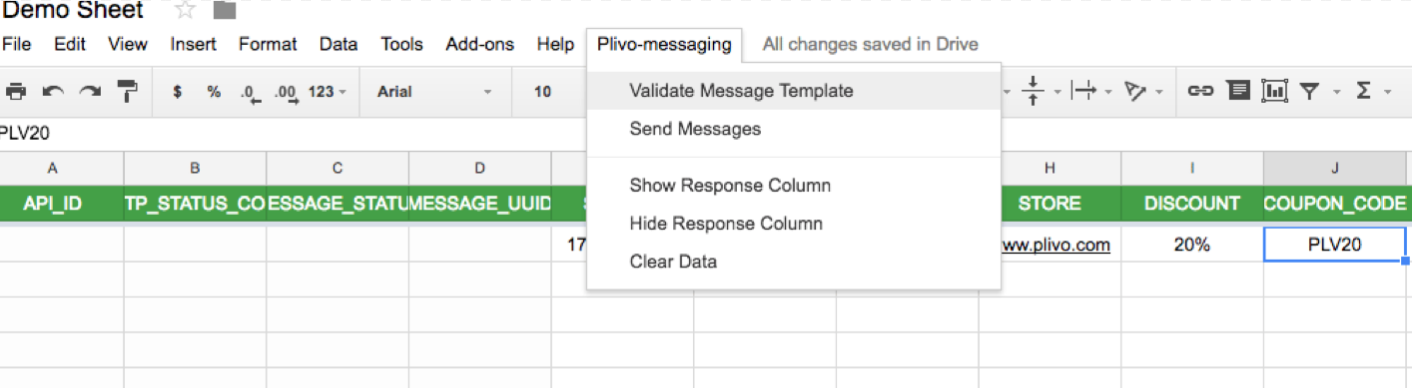
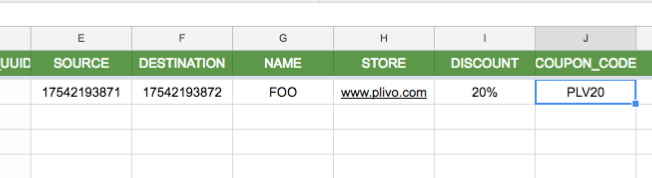
You should see two new sheet tabs at the bottom of the file called Data and Template. The Data sheet has several columns, each of which will be populated with the details of the Send Message API response for that specific row.
You can associate placeholders in your message template with custom columns on the Data sheet. The placeholders will be dynamically replaced with values found in custom columns with the same name. You can add as many custom columns as you like. This is at the core of the SMS merge functionality.
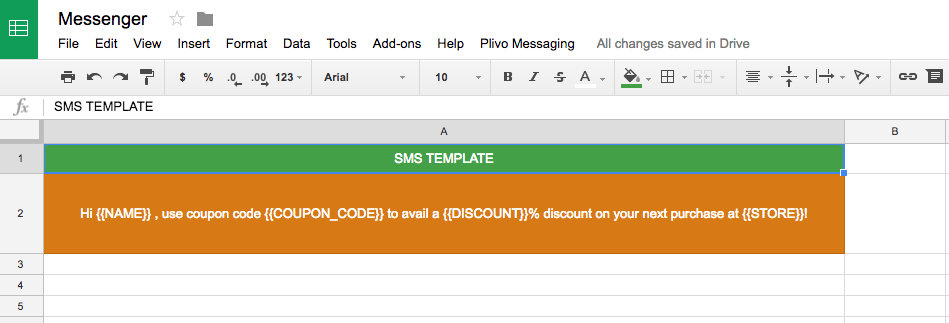
The Template sheet contains the SMS template in the A2 cell. Use the names of any custom columns you create on the Data sheet as placeholders in your template.
To try out our sheet, we created placeholders named NAME, COUPON_CODE, DISCOUNT, and STORE, the actual values of which the script picks up from columns in the data sheet with the same names.
Note that placeholders should be enclosed within double braces in the template, as you can see in the image above.
When you’re done, click on Plivo Messaging > Validate Message Template to check for errors in the message template.
Put data in the sheet
Enter values for all of the columns that are part of your SMS template.
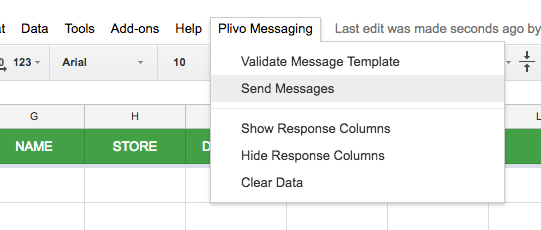
Send messages
When the sheet is ready, click on Plivo Messaging > Send Messages.
The code behind the scenes
Now that you’re familiar with how to set things up, let’s see how we put it together using Apps Script functions to make API calls to Plivo to send the messages.
Sending messages
sendMessages(data) takes a list of row data objects and processes each object one by one.
Let’s walk through this line by line.
This line creates a Base64-encoded token that we send with every API call to authorize Plivo API requests.
This for loop iterates over the list of objects and does several operations:
- Creates a temporary message object containing the source number, destination number, and message text. The message text is generated by the createMessage function, which merges the template with the placeholders. More details on that in a moment.
- Attempts to deliver the message via the Plivo API.
- Tracks the success and failure counts.
Once we have success and failure counts, we report them.
Creating messages
The createMessage function iterates over all custom headers. If the custom header is found in the message template then that placeholder is replaced with the actual value. At the end it returns the final message.
Let’s see how it works using an example.
Suppose we call createMessage(data,template_data) where data and template_data are:
Then createMessage(data,template_data) will return text
API call to send message
The trySMS function, which calls the API to send messages, takes four parameters:
- task, which is the temporary object created by sendMessages()
- row, the row number for which the function is to run
- AUTH_ID, the Plivo account Auth ID
- TOKEN, the Plivo account Auth Token
The first line creates an API call object options that contains all the HTTP parameters required to make the API call to Plivo.
UrlFetchApp.fetch is Google’s predefined function to make API calls. It returns the HTTP response.
Winning with automation
Google Sheets plus Google Apps Script makes an awesome combination that you can use to automate tasks and workflows. We hope you find our SMS sender for Google Sheets useful.


