

AI Voice Agents - The Complete Guide to Voice Chat (2025)
Learn everything about an AI voice agents, its benefits, implementation tips, and the AI voice chat applications for business success.
Longer wait times, high call volumes, and language barriers in call centers often frustrate customers. Complex interactive voice response (IVR) menus only add to the problem, leading to customer dissatisfaction. That’s why companies are adopting smarter self-service solutions like artificial intelligence (AI) voice agents. In fact, experts predict the voice bot market will reach $98.2 billion by 2027, showing a clear trend toward smarter solutions to improving customer experience.
AI voice agents technology combines Natural Language Processing (NLP), machine learning, and voice recognition to transform customer interactions. It provides quicker, more efficient service and improves the overall customer experience.
In this guide, we'll explore what AI voice agents are, their key features, practical use cases, and tips on how to implement a voice agent in your business.
What is an AI voice agent?
An AI voice agent is a two-way conversational tool that communicates with the customer. It automates inbound and outbound calls without human intervention and transfers calls to a human agent when needed.

The biggest advantage? Callers can navigate an IVR by speaking naturally, without listening to long, complex menus or pressing numbers on a keypad.
Popular AI voice agent examples include Apple's Siri, Google Assistant, and Amazon's Alexa. These tools simplify interactions, provide instant answers, and automate tasks. In contrast, advanced bots like IBM’s Watson Assistant and Microsoft’s Cortana handle customer support, sales inquiries, and internal communications.
Types of AI voice agents
Here’s a breakdown of the four main types of AI voice agents and how they can benefit your business:
Rule-based AI voice agent
Rule-based voice agent use predefined sets of questions and rules to offer answers or perform tasks. Such voice agents handle routine tasks and customer FAQs. They answer all queries that fall under the if-this-then-that logic.
For example, an e-commerce site using a bot to guide customers in checking their order status or a banking site handling routine inquiries like balance checks, bill payments, transaction histories, etc.
AI-assisted voice agent
AI-assisted voice agents use machine learning and natural language to interpret conversations so they can analyze the context and grasp what the speaker means. This makes them far more capable and user-friendly than the conventional, rule-based voice agents.
Let’s suppose a user asks Alexa, 'What's the weather tomorrow?' and then follows up with, 'How about next week?' it remembers the context. This adaptability means customers don’t have to repeat themselves, creating a more contextual customer experience.
Conversational AI voice agent
Conversational voice agents make conversations using natural language. They’re more nuanced than AI-assisted voice agents as they can handle complex conversations using everyday language to create more personalized interactions.

Google Duplex, and IBM Watson Assistant, are examples of conversational voice agents. They can make phone calls, make reservations, and handle natural conversations with a human-like tone.
Voice-activated voice agent
These bots use voice commands to answer practical questions and perform routine tasks. They are more flexible than personal voice agents that adapt to speakers and perform customized tasks.
Such bots serve as digital assistants to AI-assisted bots like Siri.
How does an AI voice agent improve customer engagement?
A customer calling your sales team wants to feel valued and understood. An AI voice agent does that. It puts the customer at the center, creating a better experience and driving business benefits as a result. Let’s understand it with a few use cases.
Use case: Get a quick update on order status, 24/7

Assuming the AI voice agent is integrated into your CRM, it greets the customer by name. Instead of navigating through a branched IVR to get their order status, the customer can simply say ‘order status’ and the voice bot pulls out the order details from the CRM and gives the user a real-time update within seconds.
Sheraz Ali, the Founder of HARO Links Builder states that their voice agent managed over 30% of customer interactions in one of their company projects and drastically reduced wait times.
“It also improved our response efficiency and led to a 20% increase in customer satisfaction scores and a reduction in operational costs within three months.”
Benefits:
- Decreased waiting time.
- Limited IVR menu navigation.
- No human intervention is required.
- Quick response times.
- Reduced business costs.
- Tangible increase in customer satisfaction.
Use case: Improve language learning for students

A language learning platform uses a voice agent to provide real-time translations and personalized tutoring. So the voice agent instantly supports students in any subject by translating and clarifying complex terms in their preferred language.
Benefits:
- Reduced requirement for multilingual staff.
- Increases inclusivity as the bot answers in the user’s preferred language.
- Language barriers are removed.
Use case: Improve patient outcomes in healthcare

It's easy to miss appointments or forget to deliver prescriptions to the patient’s home timely. A healthcare service can employ a voice agent to deliver personalized care and offer preliminary health assessments, medication reminders, and easy appointment scheduling, all according to the individual patient's needs.
Benefits:
- Saves time by streamlining appointment bookings.
- Ensures medication adherence with timely reminders.
- Reduces workload for healthcare providers with automated support.
Use case: Streamline routine financial services

Once integrated with the banking system, the voice agent automates routine financial tasks, provides instant account information, processes transactions, and delivers personalized financial advice around the clock.
Benefits:
- 24/7 access to financial services without wait times.
- Improves customer experience with quick, accurate responses.
- Automates routine tasks, freeing up staff for complex queries.
- Provides personalized advice to improve financial decision-making.
Use case: Get personal shopping assistance

An e-commerce platform can use a voice agent to assist customers with product selection, provide personalized recommendations, and automate the sales process from start to finish.
Benefits:
- Delivers a personalized shopping experience 24/7.
- Boosts sales with customized recommendations.
- Reduces cart abandonment by guiding customers to checkout.
- Improves customer satisfaction with fast, accurate service.
Features of an AI voice agent
To understand why voice agents are so effective, let’s look at the key features that improve the overall customer service experience while streamlining business operations.
The best voice agents for businesses come equipped with:
Natural language understanding (NLU)
An AI voice agent understands user queries by converting speech into text using AI and NLP. It then forms an appropriate response and converts it back into speech using text-to-speech (TTS) technology. This ability to understand and respond in natural, conversational language sets AI voice agents apart from traditional IVR systems, which rely on rigid, menu-based responses.

Personalization capabilities
Customers want quick, personalized responses to their queries, unlike complex IVR systems that frustrate them with lengthy menus. An AI voice agent offers contextual conversations, adapting to the user’s intent. It detects speech cues, skips irrelevant interactions, and also transfers calls to the right agent.
Hence, when comparing voice agents to IVRs, the bot's ability to offer personalized interactions like a human outshines communication systems that follow even the best IVR practices.
Multi-language support
AI voice agents break down language barriers, supporting multiple languages to provide a more inclusive and accessible customer experience. Businesses can easily connect with diverse customer bases across the globe.
For instance, Plivo supports speech recognition in 27 languages and their regional variants.
{{cta-style-1}}
Integration with other platforms and services
AI voice agents easily integrate with platforms like customer relationship management (CRM) systems, Enterprise resource planning (ERP) tools, and ticketing software. They access and update customer data in real time to ensure accuracy.
These bots also pull relevant details, automate follow-up actions, and sync with communication channels like email or chat. This creates a personalized and consistent customer experience across all touchpoints.
Benefits of voice agents
Let’s now look at the benefits of AI voice agents.
Enhanced user experience
Many businesses have concerns over the quality of a voice agent for customer service. However, a voice agent answers queries quickly regardless of the time of the day. Speedy, reliable answers are important to providing excellent service, making voice agents an invaluable tool for businesses looking to improve customer satisfaction.
Additionally, businesses can:
- Handle routine queries and common tasks faster than human agents.
- Remove the need for users to navigate complex IVR menus.
- Manage high-volume calls without errors.
Better cost efficiency
An AI voice agent doesn’t just save time, it also saves money. It boosts user satisfaction and reduces support times by automating repetitive queries. This frees up staff for higher-value tasks, and interacting with customers after hours has improved lead conversion.
The direct benefits to businesses are:
- Reduces the need for a larger customer support team.
- Allows human agents to focus on complex, high-value inquiries.
- Engages users outside business hours to boost marketing return on investment (ROI).
- Lowers training costs and minimizes the risk of providing incorrect information.
Accessibility for users with disabilities
With over one billion people living with disabilities worldwide, voice agents make services more inclusive. They enable hands-free, accessible interactions, allowing customers with visual, motor, or cognitive impairments to engage with the business easily. This not only improves customer satisfaction but also broadens the company’s reach to a more diverse audience.
Data collection and analysis for improved services
Voice agents don’t just serve customers — they also gather insights. Use this data to analyze data and improve services, personalize marketing efforts, and make more informed business decisions.
24/7 availability
Unlike human agents, voice agents are always accessible. They ensure customers get help whenever they need it, contributing to a more consistent and reliable customer experience.
Future of AI voice technology
As IBM's data engineer, Chris Hay puts it, "We're entering an era where every mom-and-pop shop can have the same level of customer service as an enterprise." This statement captures the transformative potential of voice recognition technology.
AI voice chat applications benefit businesses of all sizes by delivering top-tier customer experiences. Tech giants are already paving the way. Microsoft has updated its Copilot AI with advanced voice capabilities, allowing it to handle complex queries with natural language reasoning, while Meta has introduced voice AI to its messaging apps.
AI voice assistants will move beyond smartphones, integrating into wearable devices like the recently unveiled Meta Orion augmented reality glasses. For businesses handling sensitive client relationships, this could mean smarter, empathetic bots that mirror the tone and approach of a human assistant.
Key upcoming trends:
- Hyper-personalization: Customized voices and targeted recommendations.
- Advanced problem-solving: Managing complex queries using natural language.
- Real-time analytics: Analyzing customer tone for deeper insights.
Yet, challenges remain. Arvind Rongala, the founder of a skill-management solution provider, shares, “There are still issues, especially with data privacy and ensuring interactions are human-like. In addition to resolving problems with bias in training data and regulatory compliance, businesses must strike a balance between automation and personalization. For example, adhering to GDPR regarding the storage of voice data can be challenging, but doing so is essential to fostering trust.”
Ultimately, businesses need to prioritize data security, explore multi-device integration options, and develop stronger contextual understanding for natural interactions.
Launch an AI voice agent with Plivo
Any scaling business needs a voice agent that's easy to integrate, globally accessible, and cost-effective without sacrificing quality.
Plivo checks all these boxes, offering seamless integration, seven global points of presence for low-latency interactions, and competitive rates starting at just $0.0040 per minute. It's ideal for businesses willing to scale while keeping operational costs in check.
In fact, Plivo can reduce operational costs by up to 40%.
Moreover, its commitment to reliability is backed by a 99.99% uptime guarantee, with failover capabilities that switch within two seconds if any disruptions occur.
You can launch voice agents with Plivo using just a few lines of code.
- Log in to your OpenAI Account: Secure your API key and RealTime API access.
- Log in to your Plivo Account: Sign up and get a voice-enabled number.
With integration options for leading speech-to-text (STT) and TTS providers like Deepgram and ElevenLabs, you can launch AI voice agents in multiple regions, including India, using local numbers.
Use Plivo-powered voice agents for:
- Personal shopping assistance: Offer personalized recommendations, go through product selections, and close sales.
- Healthcare automation: Improve patient outcomes with medication reminders, and appointment scheduling, and offer preliminary health assessments.
- Inclusivity in education: Break language barriers in learning with real-time translations and personalized tutoring across multiple subjects.
- Routine financial services automation: Provide instant account information, personalized financial advice, transaction processing status, etc. to customers.
With a 24/7 AI voice agent, your business can handle these tasks around the clock, ensuring that customers are never left waiting. Want to improve customer experience with Plivo? Contact us today.

AI Voice Agents for Real Estate (2026): 10 Tools Compared, Real Limitations and What Actually Scales
Compare 10 AI voice agents for real estate in 2026. Evaluate response time, CRM integration, multi-channel support, and scalability to find the right solution.
AI voice agents in real estate are all about response time, coverage and quick follow-through. If your system can't answer calls immediately, qualify intent, book tours and update your CRM without manual cleanup, it's not helping you win more deals; it's adding another layer for you to manage.
This guide isn't for browsing tools. It's for operators deciding whether to commit to AI voice agents in 2026 and ship something that actually helps you scale. We compare 10 platforms based on how they perform after signup, how fast you can go live, what breaks under real lead volume, and what it takes to keep them working week after week.
Top 10 AI Voice Agents for Real Estate (2026)
The goal here is simple: Helping you choose an option that you can launch confidently, not replace after the first integration headache.
1. Plivo
When aiming to build and scale AI voice agents for real estate, you care about two things: reaching prospects first and converting more inquiries into confirmed showings. Plivo excels here since it gives you production-ready AI voice agents that place instant callbacks, answer listing questions from your data, and book tours directly on your agents' calendars. They operate reliably across phone, SMS, WhatsApp and chat without stitching together telephony, AI models and messaging vendors.
Plivo is the AI agent builder platform for voice-first, omnichannel experiences—built on a carrier-grade telephony network trusted by Uber, Meta, Zomato, and thousands of businesses worldwide. Business teams can launch agents without writing code using Vibe agent. Engineering teams can orchestrate custom voice agents in code with full control. The foundation is Plivo's global communications infrastructure spanning 190+ countries: 15+ years of proven reliable infrastructure, low latency, and the call quality enterprises demand.
Core Capabilities:
- Inbound & Outbound AI Voice Agents: Handle live calls end-to-end, qualify intent, route intelligently and escalate to human agents when needed.
- Multi-Channel Agent Coverage: Run the same AI agent across phone, SMS, WhatsApp and chat with shared context across channels.
- No-Code AI Agent Builder (Vibe): Build and deploy voice agents using plain-English instructions, no prompt engineering or coding required.
- Build your way: Business teams launch with no-code tools; engineering teams build custom voice agents with full-code control. You're never forced into a single way of working.
- Vertically Integrated Telephony (CPaaS): Voice runs on Plivo's own global telephony infrastructure, avoiding third-party carrier dependencies.
- Low-Latency Voice AI Stack: Integrated TTS, STT and LLM orchestration enables sub-500ms response latency, critical for natural voice conversations.
- Enterprise-Grade Reliability: Built on Plivo's proven CPaaS platform with 99.99% uptime, 15+ years of reliable infrastructure, and global carrier connectivity across 190+ countries.
- CRM & Workflow Integrations: Pull customer context in real time and write call outcomes back to CRMs and support tools automatically. Connect Follow Up Boss, kvCORE, BoomTown, Salesforce, HubSpot, Google Calendar, Outlook, and your MLS/IDX feed.
- You own the stack: You get to choose your speech-to-text (STT), text-to-speech (TTS), and LLM while keeping prompts and data portable and avoiding lock-in.
Best fit if you:
- Need real-time voice agents that can operate continuously at scale.
- Want to avoid stitching telephony, AI and messaging vendors together.
- Plan to deploy across multiple channels, not voice alone.
- Have defined workflows for lead qualification, routing or follow-ups.
Not a fit if you:
- Only need a lightweight voice demo, basic IVR or short-term experiment.
- Want a fully turnkey, real estate-specific tool with no configuration or workflow control.
- Don't plan to integrate voice agents into your CRM, data stack or operations.
2. Luron AI
Luron AI is best suited for teams that need 24/7 AI voice agents that never miss calls and qualify leads automatically. It supports multilingual conversations and keeps pacing tight across accents and speaking styles. The system handles inbound and outbound voice conversations in dozens of languages and automates bookings and follow-ups without human staffing.
Core Capabilities:
- Instant call answer & qualification: AI answers every call, gathers intent, and qualifies leads without hold times.
- Multilingual support: Handles AI conversations in 45+ languages to cover diverse lead sources.
- Inbound & outbound support: Manages both types of calls and can also run outbound follow-ups.
- SMS, chat & email automation: Extends voice agents to text and messaging channels for a unified engagement approach.
- CRM & integration options: Connects to existing phone systems via SIP trunking and can integrate with CRMs and ticket systems.
Best fit if you:
- Want 24/7 lead capture and qualification without adding staff.
- Need multilingual voice conversations for global or diverse markets.
- Expect to automate bookings, follow-ups and reminders on voice and messaging channels.
- Have a CRM or existing phone system you must integrate with.
Not a fit if you:
- Only need a simple inbound answering or IVR replacement without automation.
- Want a solution focused on voice only, with limited channel reach.
- Prefer fixed, transparent pricing tiers publicly listed.
3. Callers AI
Callers AI is a platform for automating customer conversations with human-like voice agents that handle both inbound & outbound calls and messaging channels, powered by your brand's data and tone. It's focused on scaling high-volume voice interactions while maintaining contextual continuity across channels in a single branded voice experience.
Core Capabilities:
- Omni-channel AI interactions: Voice agents run across phone, SMS, WhatsApp and chat from a central AI brain.
- Human-like voice calls: Agents answer and place calls in a natural conversational style.
- Lead workflows & use cases: Supports lead qualification, cold call automation, appointment confirmation, retention flows and more.
- 24/7 availability & language breadth: Designed to handle calls and messaging around the clock, in multiple languages.
- Context remembering: Conversations carry context across voice and messaging so follow-ups feel continuous.
- Integrations & automation: Connects to CRMs and tools (300+ integrations) so call outcomes can update your systems.
Best fit if you:
- Want both inbound and outbound AI calling with consistent, natural-tone responses across channels.
- Need an AI system that can qualify leads, confirm appointments and manage follow-ups automatically.
- Are scaling high call volumes 24/7.
- Prefer a central "brain" that keeps context across channels and workflows.
Not a fit if you:
- Only want a basic voice or outbound dialer with limited cross-channel logic.
- Need a tool focused exclusively on simple IVR or basic routing without AI conversation layers.
- Prefer a product you can set up and forget in minutes without upfront configuration or workflow definition.
4. SquadStack AI
SquadStack AI is best suited for teams that want AI-assisted sales and voice engagement workflows supported by configurable human-in-the-loop automation. It blends automated outreach and qualification with options to escalate to human agents where needed, helpful for revenue teams that are focused on pipeline speed.
Core Capabilities:
- Automated Lead Engagement: AI enabled workflows proactively contact prospects and qualify them using data-driven sequencing.
- Voice & Messaging Channels: Supports outbound dialing, ringless voicemail, SMS and multi-touch sequences.
- Human-in-the-Loop Escalation: Configurable handoffs to live agents when conversations need human judgment.
- Sales Workflow Automation: Built-in logic for lead routing, prioritization and follow-ups across channels.
- CRM Integration + Data Sync: Sync outcomes and engagement data back to CRMs like Salesforce, HubSpot, etc.
Best fit if you:
- Want inbound and outbound automated voice interactions with natural conversation flows and multilingual capability.
- Need AI that handles lead qualification, follow-ups and reminders as part of sales or customer engagement sequences.
- Are automating sales outreach and conversational workflows alongside voice calls.
Not a fit if you:
- Need an AI platform focused on low-latency, bespoke voice agent infrastructure tied tightly to your own telephony stack.
- Are building a multi-channel bot with CRM/telephony hooks and developer control from the ground up at scale.
5. Telgent
Telgent leans into MLS and portal context. It is best for businesses that want always-on voice AI calling with automated scheduling, intelligent call handling and quick setup. Its platform emphasizes immediate activation, seamless integration with existing phone systems and natural AI responses that handle calls, schedule meetings and engage customers day and night.
Core Capabilities:
- 24/7 AI voice calling agents: Always-on call automation that answers and routes customer calls at any hour.
- Lead engagement & scheduling: Automatically books appointments, meetings and showings based on natural language conversations.
- Inbound call handling: AI answers incoming inquiries, qualifies intent and routes prospects with minimal human intervention.
- Automated inquiry responses: Provides instant answers to property questions and responds to rental or sales leads.
- Integration with real estate systems: Works with Zillow, Realtor.com, MLS platforms, Follow Up Boss, kvCORE, BoomTown, Salesforce and HubSpot for CRM continuity.
Best fit if you:
- Need round-the-clock call handling that captures leads and books appointments without missing inquiries.
- Want your voice AI to integrate with core real estate tools and CRM systems so client details are synced automatically.
- Are focused on lead conversion and showing scheduling as part of your customer engagement workflows.
Not a fit if you:
- Only require basic outbound calling with simple scripts rather than inbound + scheduling automation.
- Expect a no-config, plug-and-play voice bot that requires zero setup or customization.
- Want a platform that handles only one channel (voice only) without extending into SMS/WhatsApp/chat automation.
6. AIOnCalls
AIOnCalls is positioned as a virtual receptionist that never misses calls or opportunities. Best for teams that want an always-on voice AI assistant that handles inbound and outbound calls around the clock, engages callers in natural language, qualifies leads, books appointments and updates CRM data.
Core Capabilities:
- 24/7 Inbound & Outbound Voice Handling: AI answers and places calls around the clock across all hours and holidays.
- Lead Qualification & Follow-Up Automation: Qualifies callers in real time and automates follow-ups via voice, SMS and email.
- Appointment Scheduling & Calendar Invites: Books appointments and sends confirmations during calls.
- CRM & Workflow Integrations: Integrates with CRMs like Zoho, HubSpot, GoHighLevel, Google Calendar for real-time lead syncing and activity logging.
- Multilingual Conversations: Supports multiple languages and can handle simultaneous call sessions.
- Live Agent Escalation: Transfers complex calls to human agents when needed.
- Real-Time Analytics & Transcriptions: Provides live call monitoring, transcripts, sentiment analysis and dashboards.
Best fit if you:
- Need an AI voice agent that never misses inbound calls and engages leads immediately, 24/7.
- Want automated lead qualification, booking and follow-ups in voice, SMS, and email without human staffing.
- Are integrating call outcomes and engagement data into CRM or calendar workflows.
- Operate in industries where speed-to-lead matters and missed calls are costly.
Not a fit if you:
- Only need simple IVR or on-premise call routing without conversational automation.
- Prefer a pure telephony or developer API platform without built-in AI conversational layers.
- Are looking for a voice agent with deep, specialized industry templates.
7. Brilo AI
Brilo AI is a business-focused AI phone and voice call agent platform that enables teams to automate real-time voice interactions across industries like real estate. It promises fast setup, natural human-like voice responses, 24/7 coverage, integration with business tools and built-in analytics, all without needing a technical team to get started.
Core Capabilities:
- 24/7 AI voice call agents: Always-on AI phone agents handle inbound calls and customer engagements at any hour.
- Human-like voice interactions: Conversational voice responses built to sound natural and engaging.
- Appointment booking & scheduling: Voice agents can book appointments with synced calendars and handle reminders.
- CRM and business integrations: Integrates with a broad range of business apps (6,000+ app connections claimed) to sync customer context and outcomes.
- Real-time analytics & insights: Live call transcripts, sentiment analysis, intent tracking and topic detection support actionable insights post-call.
- Lead qualification automation: Agents engage prospects, capture intent and route high-value leads in real time.
Best fit if you:
- Need 24/7 automated voice engagement that never misses inbound or high-volume calls for lead capture, scheduling or support.
- Need a platform that books appointments, manages follow-ups and drives customer engagement without manual management.
- Plan to integrate the voice agent with CRM, calendar tools and analytics pipelines to maintain context across systems.
Not a fit if you:
- Simply need a basic phone tree, IVR or traditional call routing system.
- Are focused solely on developer-centric API telephony without AI built in.
- Require industry-specific compliance guarantees (HIPAA, PCI, etc.) documented publicly.
8. VocalDesk
VocalDesk is an AI-enabled voice and contact automation platform that helps teams automate calling, lead follow-up, support interactions and scheduling. Its focus is on automated voice conversations and multi-channel engagement with CRM integration and configurable workflows that replace manual outreach tasks.
Core Capabilities:
- Automated Voice Conversations: Handles inbound and outbound calls using AI to engage, qualify, and route callers.
- AI-Driven Lead Qualification: Automated conversation flows that marks lead intent and priority.
- Appointment Booking & Reminders: Schedules meetings and sends reminders as part of automated flows.
- Multichannel Messaging: Engages customers across voice, text and messaging platforms.
- CRM & Workflow Sync: Connects with CRM systems and business tools to log interactions and maintain records.
Best fit if you:
- Want to automate call handling and lead follow-up without manual dialing.
- Need a solution that combines voice and messaging outreach with CRM context.
- Are focused on lead qualification and scheduling as part of broader sales engagement.
Not a fit if you:
- Only need basic call routing or IVR without AI handling.
- Require explicit developer control over telephony APIs.
- Rely on hard metrics like latency, concurrency limits or multi-region telephony SLAs.
9. Calldock
Calldock is an AI voice agent platform intended for instant lead engagement, automatic qualification and scheduling. Its system calls leads within seconds of form submission, conducts natural conversations and integrates with calendars and workflows to automate follow-ups and booking.
Core Capabilities:
- Instant lead callbacks: Calls website leads within ~60 seconds of a submission, boosting early engagement.
- Calendar booking: Agents can book appointments directly to your calendar during live calls.
- Multi-channel follow-up: Agents send SMS and email follow-ups as part of the call workflow.
- Seamless handoff & callbacks: You can trigger human handoffs in natural language and schedule intelligent callbacks.
- API, webhooks, & integration ecosystem: Support for APIs and pre-call webhooks lets you fetch context before calls and connect with Gmail, Google Calendar, Slack, Zapier and thousands more.
- Developer playground & documentation: Provides API documentation and code examples for triggered calls and automated workflows.
Best fit if you:
- Want immediate lead engagement that happens in seconds.
- Need voice agents that qualify, book and follow up automatically across voice, SMS and email.
- Plan to integrate voice engagements with calendar and business workflows.
- Need a voice agent that works with easy templates for common industries with minimal setup.
- Want a low-code or no-code setup that goes live with simple configuration.
Not a fit if you:
- Need proper inbound/outbound calling with API integration.
- Require deep telephony infrastructure control or enterprise telephony SLAs.
- Are building highly custom dialogue systems that need proprietary LLM tuning beyond the existing templates.
10. Ylopo
Ylopo is a digital marketing and lead gen platform built for the real estate industry. It combines lead capture, nurturing, AI voice calling, AI texting, branded websites and marketing automation into one system that integrates with CRMs and helps real estate teams generate and convert leads.
Core Capabilities:
- AI Voice Follow-Up: Automatically calls new and existing leads to qualify interest and connect them to agents.
- AI Text Conversations: Runs two-way SMS conversations to nurture leads until they're ready to talk.
- AI² Voice + Text System: Combines calling and texting into one coordinated follow-up engine.
- Automated Appointment Transfers: Delivers live transfers or booked appointments when leads are qualified.
- Lead Generation & Nurture: Includes PPC ads, remarketing and IDX websites to capture and feed leads into AI follow-up.
- CRM & Website Integration: Syncs AI conversations and lead activity with CRMs and branded real estate websites.
Best fit if you:
- Want lead capture with nurturing as a unified system rather than isolated voice interaction tools.
- Are a realtor or team that wants AI to automatically engage leads by text and phone, not just manage manual contacts.
- Need branded websites with IDX search and integrated lead capture feeding into automated follow-up.
- Plan to keep leads engaged over longer time horizons (e.g., 90-day voice follow-up).
- Value combined marketing + AI follow-up rather than a single channel (voice only).
Not a fit if you:
- Are looking for pure AI voice agent infrastructure like a telephony-first CPaaS platform.
- Need tools focused on enterprise-grade telephony performance, low-latency voice systems or custom telephony workflows.
What Matters Most in AI Voice Agents (Beyond the Basics)
1. Telephony Ownership vs. Vendor Stitching
Many AI voice tools rely on third-party telephony stitched together with AI layers. This often introduces latency, call drops and limited routing control at scale.
What to prioritize:
- Built-in telephony with direct carrier connectivity
- End-to-end control over call routing and quality
- Fewer external dependencies
Plivo runs on its own global CPaaS and carrier-grade telephony stack, removing third-party voice dependencies.
2. Real-Time Performance (Latency & Uptime)
Voice conversations break down quickly when responses lag or calls fail. Sub-second latency and high uptime aren't "nice to have"—they're mandatory.
What to validate:
- Sub-500ms voice response latency
- 99.99% uptime or better
- Real-time STT, TTS, and LLM orchestration
Plivo's vertically integrated Voice AI stack is designed for low-latency, real-time conversations on proven infrastructure.
3. Multi-Channel Context, Not Disconnected Bots
Leads move between calls, SMS, WhatsApp and chat. Treating each channel as a separate bot creates broken experiences and duplicate work.
What to look for:
- Shared context across voice and messaging
- Unified conversation history
- Seamless handoffs between channels
Plivo supports multi-channel agents that share context across phone, SMS, WhatsApp and chat from a single system.
4. Integration Depth (CRM, Calendars, Workflows)
Voice agents don't operate in isolation. Without deep integrations, they become another silo your team has to manage.
Prioritize platforms that:
- Read from and write to CRMs in real time
- Trigger workflows during live calls
- Integrate cleanly with calendars and support tools
Plivo integrates directly with CRMs and business systems, allowing agents to act on live data and update records automatically.
5. Built for Scale, Not Just Launch
Many tools work well for pilots but struggle under sustained call volume or multi-region deployment.
Ask:
- Can this run continuously without degradation?
- Are pricing and performance predictable as usage grows?
- Will this still work when channels or regions expand?
Plivo's AI agents are built on infrastructure that already powers enterprise-grade voice and messaging at global scale.
FAQs
What's the fastest way to go live without breaking existing operations?
Start with a single, contained flow like after-hours inbound calls or instant lead callbacks. Connect your phone numbers, CRM and calendar, define escalation rules and launch! You can expand coverage once live data validates the flow.
How do I ensure voice quality doesn't feel robotic or laggy?
Voice quality depends on latency and telephony control. Platforms with integrated telephony and real-time STT/TTS orchestration keep responses sub-second, which is critical for natural conversations that callers don't hang up on.
How does the agent stay accurate and compliant with real estate data?
The agent should pull from a restricted, curated knowledge source (MLS, IDX, listings) and operate within defined guardrails. When questions exceed scope like pricing nuance, legal terms, fair-housing-sensitive topics, it escalates to a human automatically.
What happens when call volume spikes or multiple leads call at once?
Calls don't fail—they should queue. High-intent conversations can be routed to live agents, while others are qualified, scheduled or followed up asynchronously. Every outcome is logged so nothing gets lost.
How does this fit into my CRM and follow-up workflows?
The agent reads live CRM data during calls and writes outcomes back automatically in the form of notes, disposition, next steps and booked appointments. Your team picks up conversations with full context instead of starting from scratch.
Try Plivo Free
Curious how an AI voice platform performs in your workflows, not just in theory? Plivo offers a free trial account with credits so you can experiment with voice, SMS, WhatsApp and chat services before committing. When you sign up, you get trial credits, can add a phone number and start testing features like real-time voice interactions and multi-channel engagement using APIs or visual tools like PHLO. This lets you validate performance, integrations, and call flows with your actual data—all without upfront cost.
Plivo's trial lets you test core capabilities immediately, making it easy to see how quickly you can build, launch, and refine agents that handle calls, qualify leads and update systems in real time.
Get started with your free trial now and begin building your first agent today.

Best AI Voice Agents for Customer Support and Service (2026): What to Deploy Now
Compare 10 AI voice agent platforms for customer support. Get a practical 30-day pilot framework, implementation workflow, and outcome-driven selection guide.
1) Plivo — The fastest path to production-grade AI voice agents for customer support
A recent Gartner survey found that most customer service leaders plan to explore or pilot conversational GenAI in 2025—making a clear, near-term mandate to deliver something that works on the phone channel, not just in chat. That's your cue to build a reliable voice front door with an AI agent builder platform designed for voice-first, omnichannel experiences.
Why Plivo is #1
Plivo is the AI agent builder platform that lets you build your way. Whether you're a business leader who needs to launch fast or an engineering team building custom workflows, Plivo meets you where you are. Start with no-code tools that let non-technical teams deploy agents in hours. Go deeper with low-code orchestration for more control. Or build from scratch with full-code frameworks that integrate into your existing stack. You're never forced into a single way of working.
What it does for you
Plivo's Voice AI stack is modular by design. Want speed? Use the fully integrated platform—STT, LLM, TTS, and telephony—pre-configured and ready to go. Want control? Orchestrate your agents using code with Plivo's Agentic STT models and Telephony, alongside your preferred LLM providers. Want just the connectivity layer? Use audio streaming or SIP trunking and bring everything else yourself. You decide where Plivo ends and your stack begins.
Underlying it all is a reliable, carrier-grade telephony platform that scales for enterprises—global PSTN/SIP connectivity, number provisioning and porting, call routing with failover, recording with consent, and clean human handoff with full context into your CRM or help desk.
Segment-by-segment fit
If you're SMB, launch fast with no-code tools that let you deploy agents in hours, plus a simple dashboard and connectors for Shopify and Calendly. If you're mid-market, use low-code orchestration for more control, with a modular stack that lets you use what you need—swap in your preferred LLM, STT, or TTS. If you're enterprise, build with full-code frameworks that integrate into your existing stack, plus a modular Voice AI stack to pick-and-choose what you need, governance features (RBAC, audit transcripts, data residency), and contact center integration for high availability and reporting.
Start with Voice, go everywhere
Voice is the hardest channel to get right—and it's where Plivo leads. But the same flexible building experience extends to WhatsApp, SMS, RCS, and Chat. Build once, deploy across channels, and meet customers wherever they are.
Suitable for
- Fintech customer service: consent-first flows, secure keypad capture, dispute status, and callbacks.
- Healthcare scheduling: multilingual intake, appointment changes, escalations with a summarized handoff.
- Retail and logistics: order status, returns, delivery windows, and SMS/WhatsApp follow-ups.
No more choosing between a locked-in platform that's easy but limiting, or a DIY approach that's flexible but painful. Plivo gives you both—simplicity when you want it, depth when you need it.
Explore the Voice API, check pricing, review compliance, handle numbers & porting, browse case studies, or jump into the quickstart.
2) Google Dialogflow CX — Complex, branching flows without spaghetti
Key features
Dialogflow CX uses a flow-and-page model to capture state and branching, so you can manage multi-step intents like returns, warranty claims, and multi-factor verification without dozens of brittle intents. It supports voice and text and includes versioning, experiments, and test tools. For telephony, you can use partner gateways or SIP; for global reach, put Plivo at the edge and connect to CX.
Why it matters
Complicated support journeys need explicit state. CX gives you that structure. If your "Where's my order?" workflow forks based on identity checks, fulfillment method, and policy windows, you can keep logic readable and testable. CX also plays well with multilingual experiences and mixed initiative, so callers can change course mid-conversation.
Implementation steps
Start with a single high-volume journey and draw it as a CX flow. Add a fallback page with a short menu for noisy lines. Ground the bot in your knowledge base and order system, then add handoff rules. Put Plivo in front for numbers, routing, and recording consent, and pass summaries back to your ticketing system.
Suitable for
Teams with multiple brands or product lines, where branching grows quickly and consistency matters across regions.
3) Amazon Lex + Amazon Connect — AWS-first voice automation that ops can own
Key features
Lex handles the speech and NLU for voice and text. Connect adds the contact-center fabric: routing, IVR, call recording, and agent desktop. It's a natural fit if your data and apps live in AWS and security prefers IAM-managed access. For global numbers or bring-your-own carrier control, front with Plivo and route into Connect.
Why it matters
Staying inside AWS accelerates procurement, security reviews, and monitoring. You can call Lambdas for tool use, search knowledge with Kendra, and use Connect metrics and contact flows your ops team already knows. That shortens time to value and concentrates governance in one place.
Implementation steps
Define one call flow in Connect (ID&V → status lookup → handoff). Build Lex intents from your top FAQs. Add Plivo for number management, routing, and failover. Send summaries back to your CRM or help desk. Keep a barge-in plan for noisy environments and a keypad fallback for payment flows.
Suitable for
IT-led programs where AWS standardization, auditability, and a single pane of glass for monitoring are priorities.
4) IBM Watson Assistant — Governance-first deployments in regulated industries
Key features
Watson Assistant supports omnichannel conversations with documented security and governance options, including deployment paths designed for regulated workloads. If your risk office leads the decision, IBM provides clear guidance on audit logging, data handling, and architectural choices. Add Plivo to handle PSTN/SIP, call consent prompts, and compliant recording policies.
Why it matters
Financial services and healthcare teams often need auditability from day one. When you need clear data-handling boundaries and deployment models that align with internal controls, IBM's documentation and support track help you pass reviews without months of back-and-forth.
Implementation steps
Map your data-classification rules to Watson's deployment options. Keep contact recordings and transcriptions in your approved storage. Use Plivo's routing and consent prompts to standardize intake across regions. Summarize calls into your case system for full traceability.
Suitable for
Organizations with heavy compliance needs, strict data residency, or formal audit trails for every customer interaction.
5) Cognigy.AI — IVR modernization with fine-grained voice control
Key features
Cognigy combines a visual designer with a voice gateway that supports streaming ASR, interruptibility, and transfer control. It integrates with multiple speech providers and enterprise systems like SAP and Salesforce. This lets you tune barge-in sensitivity, error handling, and handoff cues rather than living with a one-size-fits-all IVR.
Why it matters
If callers still hear a menu tree, you're wasting time and goodwill. Cognigy helps you replace rigid menus with natural conversations and graceful escalation. You keep the levers you need—timing, sensitivity, fallback prompts—so the agent feels human, not scripted.
Implementation steps
Start with the two intents that create the most queue time. Set barge-in thresholds conservatively and widen them after you test in live traffic. Put Plivo at the edge to manage numbers, recording policies, and failover. Send summaries with disposition tags to your CRM.
Suitable for
Enterprises with legacy IVRs, high call volumes, and a clear need to reduce effort without ripping out the contact-center core.
6) Salesforce Agentforce — CRM-native service automation where your team works
Key features
Agentforce brings AI agents into the Salesforce console and data model. Your service team stays in the view they know, while the agent handles common intents, drafts summaries, and routes cases. Add Plivo for calling so every phone interaction lands in Salesforce with the right context.
Why it matters
When everything you need to resolve an issue already lives in Salesforce, keeping the agent there shortens integration time and improves analytics. Supervisors can coach on the same dashboard and review case summaries, while admins maintain clear governance over data and automations.
Implementation steps
Pick one queue with repetitive calls. Tie identity checks to account data and warranties. Keep a "press 0 for a human" fallback and make sure the agent passes a clean summary with next steps. Use Plivo for the phone edge so call recordings and consent are consistent across regions.
Suitable for
Service teams that treat Salesforce as the system of record and want automation to feel native—not bolted on.
7) Zoom Virtual Agent for Phone — A 24/7 receptionist and concierge
Key features
Zoom's Virtual Agent for Phone handles greetings, routing, and the most common requests. You train it from existing docs and site content, then turn it on for after-hours or full-time reception. It's built for quick wins like appointment scheduling, store hours, and simple status checks with transfers when needed.
Why it matters
If reception lines clog your switchboard, a front-door voice agent can deflect simple questions without new headcount. As you add skills, you can expand from triage to completing tasks. For broader reach, connect Plivo to add global numbers and transactional notifications via SMS or WhatsApp.
Implementation steps
Start with greeting, business hours, and routing. Add appointment booking next. Keep live-agent transfers one click away. If you outgrow the PBX perimeter, bring Plivo in to manage numbers and cross-channel follow-ups.
Suitable for
Single-number switchboards, high-volume reception desks, and teams that need a quick, always-on front door.
8) Sierra — Enterprise "autonomous" agents with category momentum
Key features
Sierra focuses on enterprise-grade AI agents for customer service with an emphasis on agentic workflows. The leadership and market traction give executives confidence to back bigger bets. If you're evaluating multi-channel automation with rigorous SLAs, Sierra is a credible short-list option. Plug it into Plivo for reliable telephony, recording consent, and global routing.
Why it matters
Momentum reduces perceived risk. When you need cross-functional buy-in, a vendor that's already in enterprise production helps. You still need the phone edge right: numbers, routing, and failover that won't buckle under peaks.
Implementation steps
Define two end-to-end journeys (e.g., ID&V + order update; returns approval). Keep human handoff one step away and capture every call summary in your case system. Instrument containment and transfers, then iterate weekly.
Suitable for
Large teams planning multi-channel agents and looking for vendor accountability with clear deliverables and timelines.
9) Tidio (Lyro) — SMB eCommerce chat that pairs well with voice
Key features
Tidio blends live chat, an AI agent, and eCommerce integrations. It's a practical way to resolve repetitive questions, free up your team, and capture intent while buyers are on your site. Add Plivo for a simple order-status line and SMS/WhatsApp updates so customers get answers by phone as well as chat.
Why it matters
eCommerce teams need fast coverage more than complex architectures. You can start with FAQs, then add checkout and account questions. When phone calls spike—promos, holidays—route a basic voice flow through Plivo and keep your agent consistent across channels.
Implementation steps
Load your top FAQs and shipping policies, add a returns flow, and set clear handoff rules. For voice, route a single Plivo number to a lightweight agent that authenticates by order ID and ZIP code, then offers a callback option during peaks.
Suitable for
Lean teams that want to reduce repetitive chat volume now and add phone coverage without standing up a full contact center.
10) Robylon — Multi-channel AI agents focused on support teams
Key features
Robylon specializes in AI-driven customer support across voice, chat, email, and messaging. It integrates with help desks like Zendesk and Freshdesk, supports multiple languages, and offers analytics dashboards designed for service leaders. It's a pragmatic fit if your help desk is the hub of your operation.
Why it matters
You want human-like conversations that escalate cleanly. Robylon's positioning around support workflows means your ticketing, SLAs, and dispositions stay intact. For reliable calling, use Plivo for numbers, routing, and recording consent so your phone channel matches the quality of your chat channel.
Implementation steps
Start with account updates and appointment scheduling. Ground the agent in your help-desk knowledge base and macros. Track resolution time and transfer reasons; refine weekly.
Suitable for
Mid-market support teams who want a focused system that plugs into existing help-desk processes and expands to voice without heavy lifting.
How to run a safe, high-signal pilot in 30 days
Define success first
Pick three metrics: containment, transfer rate, and average resolution time. Write a one-line target for each and a go/no-go threshold. Everyone should know what "good" looks like before you take your first call.
Start with narrow, high-volume intents
"Where's my order?", appointment changes, returns, account updates. These are predictable, frequent, and measurable. Script your handoff sentence so agents never start from zero.
Build the right guardrails
Add a consent prompt, a keypad fallback for sensitive inputs, and a short backup menu for noisy environments. Keep the escalations simple: one route for billing, one for everything else.
Ground every answer
Connect the agent to your CRM/help desk and knowledge base. If the answer doesn't exist in your source of truth, escalate. Summarize every call into the ticket with disposition and next steps.
Iterate weekly
Review 20 call transcripts together. Fix the top three friction points. Update prompts and knowledge. Ship changes. Repeat.
FAQ
What's the fastest way to launch a voice agent without changing my stack?
Keep your telephony and routing on Plivo, connect your preferred conversation engine, and ground it in your CRM/help desk and knowledge base. Start with one number, one intent, and a simple fallback.
How should I measure success in the first 30 days?
Track containment, transfer rate, and resolution time. Listen for barge-in moments and interruptions—they reveal prompt and timing issues that you can fix quickly.
How do I implement consent, recording, and PCI/PHI safely?
Play a clear consent prompt before any recording. Use keypad input for payments or sensitive data. Store recordings and transcripts in approved systems and keep audit logs.
When is Dialogflow CX better than Lex, IBM, or Cognigy?
Choose CX for complex branching flows and multilingual journeys; Lex when your team standardizes on AWS; IBM when governance and deployment control are paramount; Cognigy when you're modernizing IVR with fine-grained voice settings.
How do I handle accents, noise, and barge-in in production?
Use a robust ASR, tune your barge-in sensitivity, and keep a keypad fallback. Test in noisy environments and shorten prompts. Summaries help human agents pick up without asking callers to repeat themselves.
Conclusion: Build the voice edge once, then scale what works
A measured result to anchor ROI. McKinsey reported that, at one company with thousands of agents, applying generative AI raised issue resolution and lowered handling time—small percentage gains that compound into real savings at scale. That's the kind of lift your leadership expects—and the reason to start with a focused pilot that moves one metric.
Bring your "brain" of choice, but keep the phone edge on Plivo so every call connects, every consent is captured, and every handoff carries context. Define three KPIs, pick one journey, and go live with a human fallback. Review transcripts weekly, then scale to the next two intents.
Ready to hear what real-time voice feels like? Build your agent or talk to an expert today.
.jpg)
RCS Marketing 101: Your Complete Guide
Discover how RCS marketing delivers rich, branded messages that drive engagement for your business.
SMS marketing works, but let’s be honest: it feels a bit outdated compared to modern apps.
But what if you could send rich, interactive messages with branded content, images, buttons, and carousels straight to your customers’ native messaging apps?
Rich communication services (RCS) makes that possible.
If you’re ready to explore how RCS marketing can transform your engagement strategy, this guide will walk you through everything you need to know. Let’s get started.
What is RCS marketing?
RCS marketing uses rich communication services to send interactive, branded messages through a customer’s default messaging app. It’s a modern upgrade to SMS that lets businesses share images, buttons, carousels, and more — all without needing third-party apps.
A user on Reddit summed up this perfectly:

RCS lets you send messages that are visually branded with logos and colors while remaining interactive. This turns static updates into an app-like experience inside a message.
This shift is part of a broader industry move, led by Google and backed by major mobile carriers, to upgrade messaging infrastructure and make RCS the default standard on Android devices.
As support continues to grow, businesses are adopting RCS as part of their customer engagement strategy. Platforms like Plivo make that adoption easier with a reliable, enterprise-grade gateway to deliver rich, reliable RCS campaigns at scale.
RCS vs. SMS marketing: A quick comparison
Marketers today are looking for ways to deliver more interactive and visual communication, and RCS is clearly leading the way.
While SMS still works well for simple alerts, it lacks the creativity and engagement that RCS marketing offers.
Let’s take a quick look at RCS vs. SMS marketing.
4 key benefits of RCS marketing
RCS marketing makes messaging feel more natural for both you and your customers. And since you can see what’s working and what’s not, it’s easier to pivot your strategy and get better results.
Here are its four key benefits.
1. Improved user interaction
One of the biggest advantages of RCS marketing is how seamless it makes the experience for your customers. Instead of typing out replies or clicking a link to open a website, users can just tap a button right inside the message.
Want them to book a demo, check order status, or browse products? It’s all possible with just a tap.
Fewer steps mean less effort, and that leads to more people following through. In fact, individuals spend up to 37 seconds engaging with RCS messages, which is a lot longer than most other types of mobile messaging.

That extra time and interaction can make all the difference when you’re trying to convert interest into action.
2. Consistent brand experience
RCS marketing doesn’t just tell people who you are — it shows them.
Verified business profiles help people know they’re getting messages from the real brand. Every message shows your brand’s logo, name, colors, and a checkmark. These small details make it clear that the message is coming from a genuine source.

This consistency matters because 88% of people are more likely to buy from a brand they trust.
3. In-depth analytics
With RCS marketing, you can track open rates, button clicks, and how people interact with each part of your message.
You get clear visibility into what’s working and where users are dropping off.
This makes it much easier to measure the return on investment (ROI) and fine-tune your campaigns. The more you understand how people engage, the better you can shape your messaging for results.
4. Higher conversion potential
RCS marketing makes it easier for customers to take action — whether that’s browsing products, booking a service, or making a purchase — all within the message itself.
With fewer clicks and no need to switch apps, the path to conversion feels effortless. And when it’s that easy, more people follow through.
For example, EaseMyTrip used RCS to run a post-COVID travel survey. They added quick-tap answer options and followed up with a thank-you coupon. The campaign saw a 4x higher click-through rate than email, 10x more survey completions, and a 2.7% increase in conversion rate.
5 major use cases of RCS marketing
Here are five major use cases showing how brands are using RCS marketing effectively.
1. Product promotions
RCS makes product promotions feel more like browsing a store than reading a message. Brands can send image carousels that customers can swipe through to explore new arrivals, check product details, and see what’s available without leaving their messaging app.

2. Abandoned cart reminders
The average cart abandonment rate is over 70%, which means most shoppers never make it to the finish line. RCS marketing can help bring them back by making the reminder more engaging and easier to act on.
You can send a message that shows exactly what they left behind, along with a clear button to complete the purchase. It’s visual, straightforward, and the entire experience stays within their messaging app.
3. Appointment confirmations and reminders
A PhD thesis from Manchester Metropolitan University found that forgetfulness is the most common reason people skip their appointments.
RCS makes it easier for both businesses and customers to stay on the same page. You can send a message that shows the appointment details along with a simple calendar view. Add buttons to confirm, reschedule, or cancel — all within the chat.

4. Customer surveys and feedback
Getting feedback is important, but most customers lack the time or patience to complete lengthy forms. RCS marketing makes it easier by allowing brands to ask short, targeted questions and receive quick responses.
Plus, the rich features of RCS let you include images, ratings, or multiple-choice options, making feedback feel more like a conversation.
5. Customer support follow-ups
After a support request is resolved, following up shows customers you care and helps close the loop on their experience. But if the follow-up message gets buried in an email inbox or goes unnoticed, that opportunity to connect is lost.
With RCS marketing, you can send a quick message to check if everything’s working fine. You can include helpful buttons like “Change Password,” “Manage Account,” or “Talk to Support.”

RCS marketing myths and realities
Despite RCS marketing’s growing adoption and proven results, some common misconceptions still hold businesses back from trying it. Let’s look at a few of the biggest myths and what’s actually true.
Myth 1: RCS marketing is too expensive
At first glance, RCS business messaging can seem like a pricey upgrade. Rich visuals, tap-to-action buttons, and branded layouts look premium, so it’s easy to assume they come with a hefty cost.
But cost alone doesn’t tell the full story.
What you get in return matters more. RCS drives significantly stronger engagement with higher click-through rates, increased interactions, and better overall outcomes.
Take Club Comex, the loyalty program of North American paint brand Comex. They sent two rich and interactive RCS campaigns to their members and saw a 10x higher click-through rate, which helped increase revenue by 115%.
That’s the value side of the equation. Better targeting and richer content mean more people click, engage, and convert.
Myth 2: RCS marketing doesn’t reach enough users to be worth it
This concern made sense in the early days of RCS, when adoption was still catching up. But the landscape looks very different now.
In June 2024, the 12-month growth of RCS users reached 36.3%, showing faster uptake than other messaging channels. More Android devices support RCS by default, and it’s being rolled out across more networks globally. Even Apple has announced support, which means RCS is on track to reach a massive number of smartphone users worldwide.
With that kind of growth and widespread support, the hesitation around RCS is starting to fade. Brands can confidently invest in RCS marketing knowing it will connect with more customers than ever before.
Myth 3: RCS gets treated like spam and ends up ignored just like emails
Unlike email, RCS messages appear directly in the user’s primary messaging app alongside personal conversations. They include rich media and interactive elements, making them more engaging and less likely to be ignored.
This creates a more natural, conversational experience that drives higher open and response rates than traditional marketing channels.
Why choose Plivo for your RCS marketing needs
With RCS, you can turn simple messages into rich, branded conversations that feel more like chatting than broadcasting.
Plivo gives you the tools to make that shift without the hassle. From verified messaging to smart automation, everything works together to help you connect better and respond faster.
When combined with AI Agents and a unified customer data platform, RCS becomes more than just messaging. You can deliver personalized experiences at scale, automate everyday interactions, and keep conversations flowing without lifting a finger.
Here’s what you get with Plivo’s RCS API:
- Real-time personalization: AI Agents tailor conversations using customer profiles and behavior triggers to improve engagement and conversions.
- Multi-channel fallback: If RCS isn’t supported, messages automatically switch to SMS to ensure delivery and maintain consistent communication.
- Conversational automation: AI Agents handle FAQs, process orders, schedule deliveries, and route complex queries within RCS.
- All-in-one messaging platform: Manage RCS, SMS, WhatsApp, Voice, and more from a single dashboard.
- Reliable performance: 99.99% uptime and global infrastructure keep your campaigns running smoothly.
With Plivo’s no-code tools, you can quickly launch AI-powered RCS messaging across channels and deliver a consistent customer experience from day one.
See how you can launch your first RCS marketing campaign with Plivo by requesting a demo today!


Introducing Multiparty Calls with Plivo
Plivo introduces a new multiparty call component, now available in public beta.
Creating basic conference calls with Plivo is easy. But what if you want more control for advanced contact center and sales dialer use cases, such as:
- being able to dial out to another agent or supervisor directly from the call
- being able to do a warm transfer to another agent
- enabling a supervisor to coach an agent without the customer listening to it
- playing custom background audio to different parties
At Plivo, we understand how important it is for call centers and sales teams to monitor the performance of their agents using recorded calls as reference for training. Gathering insights driven by AI technologies helps improve the overall quality of their service.
That’s why we’re excited to announce our multiparty calls component in public beta, which gives customers the ability to assign roles like agent, customer, and supervisor to participants of a call. Using this, businesses can manage the user experience programmatically by adding and removing agents on the call, performing warm and cold transfers, and enabling supervisor coaching. Multiparty calls can be used for standard multiparty audio bridges, inbound contact centers, and outbound sales dialers, for up to 10 participants.
For traditional “meeting” use cases where more participants may need to be connected, please checkout our conference offering.
Here are some great features that can help you enhance your experience with our multiparty call component.
Assign agent and customer roles
Businesses can assign users roles and trigger different permissions accordingly. You can configure a multiparty call so that the agent can initiate and manage transfers, and can even specify different hold music to be played to the agent and the customer. You can also assign a ”supervisor” role to appropriate stakeholders so they have the ability to monitor calls as they see fit.
Coaching functionality
Businesses can also take advantage of coaching functionality. A coach participant can talk to one participant without the other caller hearing the audio. This is a must-have in call centers that want agents to perform well and provide excellent service. Coaching provides a way for call center agents to learn new skills, get feedback on the work they’re doing in real time, and get to the heart of problems they’re experiencing.
Call recording controls
Businesses will have the flexibility to determine which parts of the conversations are recorded. This means adding commands to record the leg of any conference call. This is especially useful when an agent wants to start a call recording only after the customer provides consent to record, or pause an active recording when collecting payment information. Many agents need to collect PII (personally identifiable information), but it could be a liability to have that information stored in a recording if it isn’t necessary. Many prefer to pause the recording while collecting the PII, then resuming the recording immediately afterward.
You can even go as far as setting controls at the participant level, so that if a supervisor is on the call to coach an agent in real time, you can configure the recording to only be inclusive of the customer’s audio.
Warm transfers
Finally, businesses can add people to an in-progress phone call to provide a seamless customer experience — also known as a warm transfer. Some businesses have a receptionist speak with the appropriate agent before they send a call to them, or a representative from one department briefs another colleague about the inquiry at hand before transferring the customer. Typically, a caller is put on hold while the call center operator dials the desired extension. After being notified, the transfer destination can then accept the call and complete the transfer. Taking a moment to make sure the transfer recipient has all pertinent info goes a long way in customer service toward ensuring clients’ continued happiness.
Multiparty calling programmatically adds the right participants at the right time to streamline customer support and virtual coaching sessions and consultations, while also assigning proper user permissions using only participants’ phone numbers. And getting started is easy — just check out our thorough API Reference Guide to learn more.
Plivo’s multiparty calling component is available in public beta. Haven’t tried Plivo yet? Getting started only takes five minutes! Sign up today.

How to Prepare for Post-Pandemic Changes in Business Communications
Get tips on how a CPaaS can help your business meet today’s customers’ changing communication expectations.
The COVID-19 pandemic has changed people’s behavior in a lot of ways — among them, how they interact with businesses. Businesses that want to maintain communication with customers and prospects need to consider how their communication strategies have to change in light of a more online, remote, and virtual world.
At Plivo, we spend a lot of time thinking about how to help businesses communicate better. We just published an ebook called Rethinking Business Communications: Plivo’s Guide to Better Customer Experience in 2021. You should download it to get our perspective on how you can adapt your communications to meet changing customer expectations. Here’s a taste of what you’ll find in the ebook.
Reach out strategically
Want to stay in touch with your customers? SMS and MMS is the way to go. SMS messages have a 98% open rate, 90% of text messages are read within three minutes, and text messages have a 209% higher response rate than phone, email, or Facebook.
Businesses can use text messaging to their advantage, but the details can trip them up. Should they use long code phone numbers or short codes? What about the new 10DLC numbers? How do you send potentially hundreds of thousands of messages and meet throughput requirements while staying in compliance with carriers’ restrictions on messaging volumes? The ebook offers some tips, and if they’re not enough, we’ve written a blog post on SMS best practices.
Let customers help themselves
Customers don’t always need you to help them get where they want to go. And we’re not talking about just pushy salespeople in retail shops — every business is moving toward more self-service.
One way to automate self-service is through interactive voice response (IVR) systems. With a good IVR setup, customers can open service tickets, pay bills, schedule payments, book appointments, and track order shipments. On our website, we’ve got a great tutorial on how to put together an IVR system using PHLO, our visual workflow builder, or by using our APIs in any of seven popular programming languages.
Always be there
Customers and potential customers expect businesses to be there for them all the time. That can be tough on a company’s social media team — but hey, we’re all having trouble sleeping these days, so maybe responding to tweets at 3 a.m. isn’t so bad.
When it comes to business communications, always being there means having a communications infrastructure that’s always online. That’s especially important for tasks like two-factor authentication, for example. It’s critical that every 2FA voice and SMS message gets delivered within the 10- to 15-second window that avoids disruption in the customer experience.
Plivo provides 99.99% uptime, as do other cloud communications platforms, but even that may not be enough. That’s why it pays to have a fallback channel — a second provider that can step in and seamlessly maintain your availability. Having a second communications platform can also help you load-balance your messaging when both platforms are up.
Communications for a changed world
Those are just a few of the tips and hints you’ll see in our latest ebook. We think you’ll find additional observations in it that can help your business.
It’s going to be a long time before we give up social distancing for group hugs, and elbow bumps for handshakes. We might never get back to our old habits of doing business primarily in person. Download our Rethinking Business Communications ebook for more tips on how to meet today’s customers’ changing communication expectations.

A Guide to Sender IDs: Why They’re Important and How to Use Them
Sender ID Number: Sender ID is the name or number of the sender of an SMS message. Here’s everything you need to know to get started with your SMS campaigns.
Put yourself in the shoes of the average, everyday consumer, and imagine you get two text messages from two different companies. The first message comes from a seemingly random number that you don’t recognize, and the other has a clear sender.
Which one will you ignore or delete? Which one will you open and read? Which one are you more likely to trust?
Sender identification codes (sender IDs for short), help message recipients more easily identify who a message is coming from. When recipients see an ID they recognize, they’re more likely to trust the message they’re receiving and open it.
In short, sender IDs can help you get better results from your SMS campaigns.
Not every country supports sender IDs (more on that below), but in the countries that do, they’re an effective way for businesses to successfully engage with their customers.
In this article, we’ll cover what sender IDs are, why and where businesses should use them, and how they can enhance SMS campaigns.
What are sender IDs?
Sender IDs are alphanumeric identifiers you can use to brand your text messages and show your customers who you are before they tap the message to read it.
Sender IDs can use any combination of numbers and letters up to 11 characters (except in India, which requires exactly six characters) to spell out a brand name, a product, or almost anything you want.
It’s important to note that alphanumeric sender IDs are not available everywhere. In fact, carriers in nearly all of the Western Hemisphere, including the US and Canada, plus China, don’t support alphanumeric sender IDs.
If your SMS campaigns are limited to those areas, you can skip the rest of this article, though we encourage you to learn about Google Verified SMS as an alternative.
If you send messages to customers in Europe, Asia, and Australia, sender IDs can be an important tool for your campaigns.
Why use sender IDs?
Sender IDs can be a critical part of successful SMS campaigns because they help you create trust among your customers, and may lead to greater engagement with your messages.
When you get a message from someone you know, you’re more likely to open and read that message. Customers who have opted in to receiving your messages should recognize your sender ID and associate it with your brand. That’s important in establishing trust and helping to make sure they open future messages.
On the other hand, without a sender ID, you could be diminishing your brand. Customers may not connect your message to your brand, and will almost certainly forget the random number your message comes from. This could make them less likely to open and read your messages in the future.
The upshot is that using sender IDs is an SMS best practice for building brand familiarity with your customers. In some cases, it’s a necessity. Many countries require sender IDs.
Does that mean that if you need to reach customers in the US and Canada, where alphanumeric sender IDs aren’t available, you shouldn’t consider SMS campaigns? Certainly not. No matter where you’re sending text messages, SMS is an effective way to reach customers — but if sender IDs are an option, you should use them.
When should you use sender IDs?
It’s almost always a good idea to use branded sender IDs when running an SMS campaign in which some of the recipients are in countries that support them. Here are some specific use cases where it’s especially important.
Reminders/alerts/notifications
SMS notifications allow businesses to disseminate critical information with reach, immediacy and ease. This is especially important for time-sensitive notifications such as flight changes or appointment reminders. A sender ID helps ensure that recipients recognize the sender as a trusted contact.
Banking/financial
If you’re sending messages for two-factor authentication to allow users to set up accounts, reset passwords, or conduct other private business, you can help customers feel confident they’re being contacted by the right company so they can avoid falling for scams or compromising their private data.
Marketing/promotions
When you’re contacting customers to advise them of an offer, promote a product, or simply to build your brand, sender IDs are critical. Without them, customers may assume your message is a scam, or simply ignore it, even if they opted into your messages.
Ride-hailing/delivery
As with the other examples, SMS campaigns advising of a ride-hailing arrival or order delivery require trust. People want to make sure the entity contacting them, asking them to open their doors, is legitimate.
Customer nurturing
One of the most powerful ways to use SMS is to engage customers after they’ve taken an action or attended an event. A well-placed message can drive customers toward a purchase. Seeing a branded sender ID allows them to instantly make the connection to their previous experience with the brand, and they may be more likely to engage.
Plivo makes sender IDs easy with registration in the console
Rules and practices around sender IDs vary by country, beginning with the registration of the IDs. Some countries require that IDs be preregistered, while others don’t. In countries that do require preregistration, companies need to provide information, and sometimes additional documents, to validate the sender IDs they wish to use. Depending on the country, sender ID validation can take up to two weeks to complete.
Sender IDs need to be registered and maintained separately for each country, which can be a cumbersome process when you want to send messages to multiple countries. However, Plivo’s SMS API simplifies the process by managing all of your registrations from the Plivo console, reusing documents, and tracking progress as you go. You don’t have to manually send documents to each country, and you can track the status of your registration in real time.
To learn more about sender ID registration, read our guide to sender ID registration or talk to one of our experts.

How to Make and Receive Phone Calls Using Plivo’s Voice API and Go
How to make and receive outgoing and incoming voice calls using Go with the Plivo Voice API.
Your company has settled on Plivo to handle its voice and messaging communications, and now it’s your job to start integrating Plivo into your company’s applications. Don’t worry — Plivo has an SDK to help you out. Let’s see how to make outbound calls and handle incoming calls through Plivo in a Go application.
Install the Plivo SDK
We’ll presume you already have your Go environment set up. Change to the directory into which you want to install the Plivo Go SDK and run
or you can clone our GitHub repository into your GOPATH.
Find your Auth ID and Auth Token
You have to have proper credentials before you can use the Plivo API. We provide an Auth ID and Auth Token in the Account section at the top of the overview page of the Plivo console.

Choose a phone number
You need an voice-enabled Plivo phone number if you want to receive incoming calls. Check the Numbers screen of the Plivo console to see what numbers you have available. You can also rent numbers from this screen.
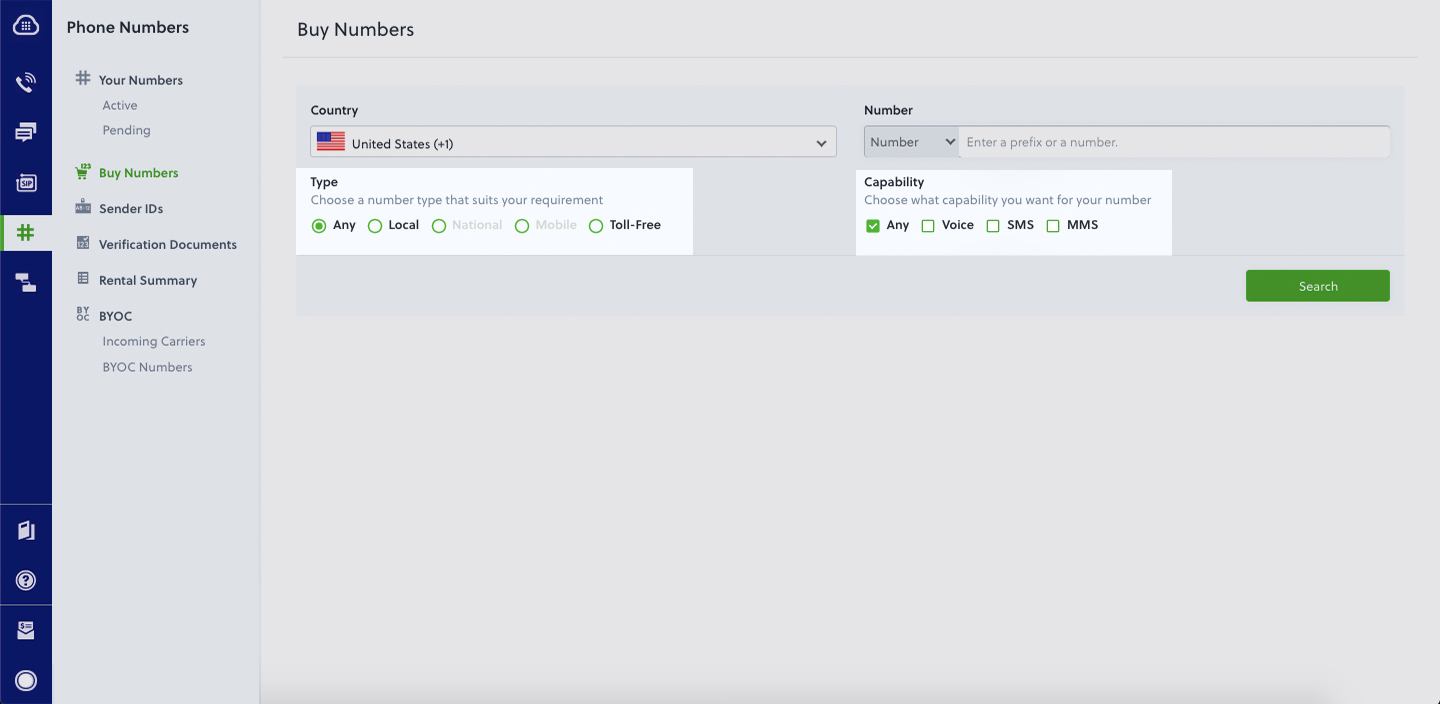
Use PHLO to set up an outbound call
Now you can turn to PHLO, Plivo’s visual workflow design studio, to set up the workflow for an outbound call. Click on the PHLO icon on the left-side navigation bar, then on Create New PHLO. In the window that pops up, click Build My Own.
Let’s start with a very simple workflow. From the list of components on the left side, drag and drop the Initiate Call component onto the canvas, then connect the Start node to the Initiate Call node using the API Request trigger state.
Now you can add configuration information for the call in the right pane. Valid phone numbers begin with a plus sign and a country code. Add a caller ID number in the From field and a destination number in the To field, then click Validate to save the configuration.
PHLO lets you use variables for From and To values, but we’re keeping it simple for this example.
Now drag the Play Audio component onto the canvas. Connect the Initiate Call node to Play Audio using the Answered trigger state. In the Configuration panel, enter the text you want to play for the call recipient, then click Validate.
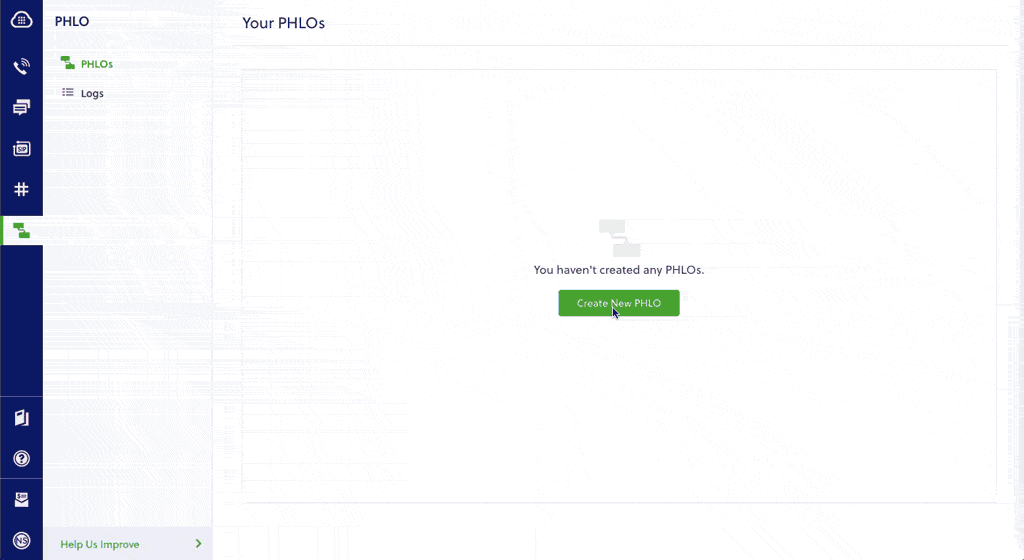
That’s all we’re going to do for now — we told you it was simple. Give the PHLO a name by clicking on the pencil icon in the upper left, then click the Save button in the upper right.
Run the PHLO to make a call
Now you can trigger the PHLO and test it out. Copy the PHLO ID from the end of the URL of the workflow you just created. You’re also going to need your Auth ID and Auth Token. Create a Go source code file — let’s call it TriggerPhlo.go — and paste this code into it:
Substitute actual values for <auth_id>, <auth_token>, and <PHLO_ID>. Save the file and run it with the commandBoom — you’ve made an outbound call.
Set up inbound calls
Of course outbound calls are only half of the equation. Plivo supports inbound calls as well. To see how, let’s create another PHLO and again specify Build My Own. This time, drag the Play Audio component onto the canvas and connect the Start node to it using the Incoming Call trigger state. In the Configuration panel, enter some text to speak to the caller when the call is answered, then click Validate to save the configuration. Give this PHLO a name, then click Save.
Before you can receive a call using this PHLO, you have to assign it to a Plivo number. Go back to the Plivo console and click on Phone Numbers on the left nav bar. From the list of Your Numbers, click on the number you want to use. On the next screen, from the Application Type dropdown, choose PHLO. From the PHLO Name dropdown, choose the PHLO you just created. Then click Update Number at the bottom of the screen.
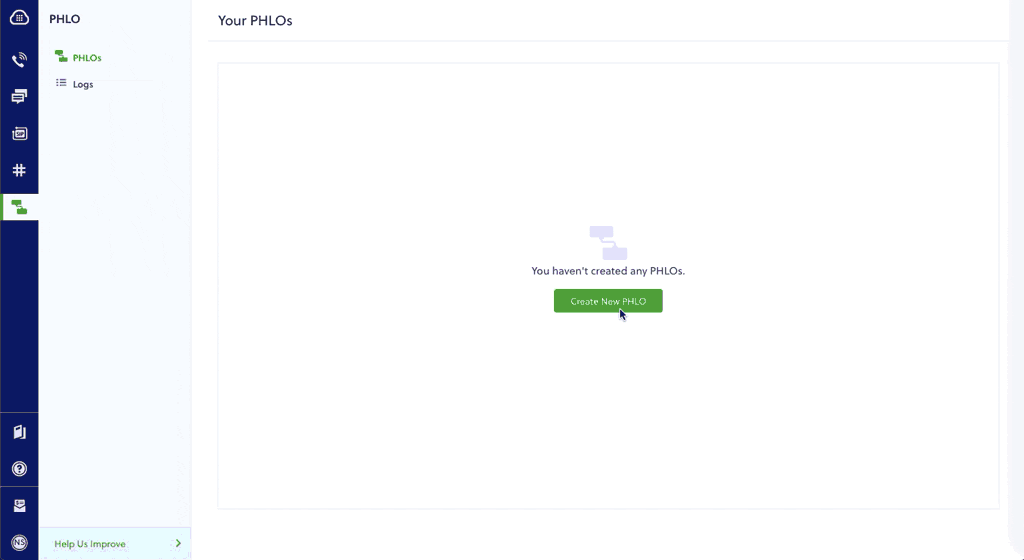
Guess what? You’re done! You don’t have to run a program for this PHLO to work. Just call the Plivo number you specified and you should hear the message you configured read by Plivo’s text-to-speech processor.
Conclusion
And that’s all there is to sending and receiving voice calls using Plivo’s Go SDK. Don’t use Ruby? Don’t worry — we have SDKs for PHP, Java, Node.js, Python, .NET Core, .NET Framework, and Ruby.
Haven’t tried Plivo yet? Getting started takes only five minutes. Sign up today.

Overcome SMS Messaging Roadblocks with an SMS API Platform
If you’re not using an SMS API provider, delivering messages to your customers is like a bad game of telephone. Here’s how to overcome your comms roadblocks.
Remember playing “telephone” when you were a kid? One of your friends would think of a message, then whisper it into the next kid’s ear, who would then pass it on to the next in line.
Turns out, playing telephone is a lot like using SMS to send messages internationally — except that one of the kids in the chain may suddenly decide to use a different language, or wait several hours before relaying the message, or not pass the message on at all.
Delivering SMS messages across multiple countries is a tricky game that requires you to rely on unreliable networks. Too often, that means your messages don’t get through.
If sending SMS messages is important to your business, it’s important to know why the process can be challenging. Chances are you use, or are considering, an SMS API platform as the infrastructure to integrate SMS with your applications. By learning about potential bottlenecks, you can evaluate an SMS API provider on how they can help you overcome the difficulties and maximize your success.
Problem: potential network issues
Sending an SMS message seems like it should be simple and straightforward. You press Send and your message goes out and pops up on the recipient’s handset.
If you’re sending SMS messages within the United States and Canada, you can usually count on that process happening with no surprises. But sending messages to users in other countries can be complex. Your message may have to pass across unreliable networks, due to the inherent complexities of sending SMS messages globally.
When you send messages internationally through an SMS API provider, the messages navigate a labyrinth of networks, hubs, and carriers. Every time your messages get handed off from one carrier to another, the potential for problems multiplies.
Think of it like air travel: If you have a direct flight or just one connection, chances are you’ll reach your destination on time. But if you have multiple connections through different countries on different airlines, your chance of encountering delays increases.
Likewise, international mobile networks and carriers can introduce complexities that cause your SMS messages to fail in a variety of ways.
Messages may be delayed
When sending SMS messages, you expect your messages to be delivered instantly. However, if you’re dealing with multiple carriers and aggregators (businesses that decide how to route messages to different carriers) around the globe, that’s not guaranteed.
Depending on your use case, delays of up to a minute or two might be OK, as long as the message gets delivered. But for time-critical messages, such as one-time passwords or two-factor authentication messages, a delay of just 20 seconds is the same as failure.
The message might look different than expected
Some networks struggle with delivering a message in the format in which it was created. Longer messages might be split up into multiple messages, or the networks might not support special characters, such as Unicode or GSM.
Format changes could alter a message’s intent, leave the user confused, or even render the message unreadable. And unexpected changes may cause recipients to dismiss a message entirely.
The sender ID might not be retained
With many networks, it’s not guaranteed that yoursender ID will be retained. If users don’t recognize the sender, they may dismiss the message or, worse, block the sender.
The message may never be delivered
Another frustrating thing that can happen when you send SMS messages to users is that the message simply doesn’t show up, and you may never know it.
Unfortunately, this scenario does happen with some networks. Messages don’t get sent, and delivery reports don’t reflect what actually happened.
Low-quality mobile carriers in many countries don’t provide delivery reports on SMS messaging, making it impossible for companies to evaluate their campaigns. Some carriers that do provide reports may even lie about them.
With the problems and unreliability of sending global SMS messages, the situation may seem hopeless. But with the right SMS API provider, you can overcome these challenges.
Plivo helps you get messages through — no matter what
Plivo’s SMS API platform helps you run a successful SMS program, even on unreliable networks. We make sure that your messages not only get delivered but also maintain their integrity and accuracy.
We achieve that by not working with aggregators, but instead maintaining our own relationships with high-quality carriers. That ensures that our customers’ messages don’t get stuck in an aggregator’s infrastructure, but instead take a more direct route to users’ handsets.
One of the techniques we use in countries with multiple carriers is to use handsets as global test nodes. Using this technique, the platform sends messages to the test nodes and measures the results, including deliverability, speed, sender ID confirmation, and character set. Based on this feedback, we can choose the best route to maximize delivery success.
Another approach we use for one-time password messages is to mark them as trackable. When a user receives such a message and successfully authenticates, the platform gets those results reported back. Our delivery reports then let customers measure performance. It’s important to know that you can evaluate carriers on their consistently high deliverability rates.
Our platform supports different character sets in different countries and languages, and with different carriers. GSM is the standard default encoding, and our intelligent message system will automatically encode any text message that contains a Unicode character into the equivalent GSM character. We also ensure that your messages are not split up, so they’re delivered the way you intend.
Another way we help ensure accurate delivery is by supporting sender IDs, which are required in many countries to make delivery easy. A sender ID is what appears on someone’s phone to indicate who sent the message. If your sender ID isn’t retained through the delivery process, it can slow down delivery and reduce trust among your users. Plivo’s SMS API platform makes sender ID registration easy, so your users trust your messages.
Regulatory compliance
User data and privacy regulations vary from country to country, making compliance complicated, but it’s critical that you follow regulatory guidelines. Running afoul of data privacy and opt-out rules can put your whole program in jeopardy and potentially subject you to penalties.
Our SMS API platform helps you make sure you’re meeting all of the necessary requirements by
- protecting and purging sensitive customer data,
- complying with each country’s frequency limits, and
- offering simple, automatic opt-outs.
With these features, we can help ensure that your SMS messages comply with relevant regulations.
Reliability strategy
As we’ve mentioned, carriers in some countries are unreliable. We partner with Tier 1 carriers that promise high deliverability and accurate reporting. But even those carriers occasionally have problems, so we’ve built a redundant carrier network. If one carrier’s systems are down, we can automatically reroute messages to the next best available carrier. As a result, we guarantee uptime and availability rates that work out to less than an hour of downtime over the course of a year.
Geographic coverage
As your business grows, you may need to contact customers regardless of where they are in the world.
Our platform features a quality-based routing engine that provides fast global delivery. Our real-time message delivery and opening feedback reporting help us evaluate carrier routing with you, so we can apply those insights to future campaigns.
Plivo can even help with open and response rates. Depending on your use case, we can automatically select local phone numbers based on recipients’ area codes. Recipients are more likely to trust and open a message when they see that it comes from a local number.
Custom solutions
Businesses have varying needs and use cases for SMS campaigns. Whether you’re sending promotional texts or time-sensitive messages for two-factor authentication, Plivo lets you quickly and easily customize, scale, and integrate features that matter to you.
We let you deliver messages using consistent sender IDs to maintain trust and connection with your customers. You can customize your code quickly and easily to simplify your campaign deployments, and segment your customers to track campaign performance.
And that’s just the beginning. Plivo offers the solutions you need to run successful campaigns.
Choose an SMS API that reliably delivers your messages
To reach customers by text message, you need an SMS API provider that ensures your messages get through. Our SMS API platform and global delivery network help leading businesses reach their global customer base in minutes with SMS autoresponders, surveys, marketing, reminders, and more.
To learn more about the Plivo SMS API platform,talk to one of our experts.

How to Send and Receive SMS Messages Using Go and Plivo’s Messaging API
Get started with Plivo’s SMS API and Python to send and receive SMS text messages.
Your company has settled on Plivo to handle its voice and messaging communications, and now it’s your job to start integrating Plivo into your company’s applications. Don’t worry — Plivo has a Go SDK to help you out. You can use it write Go applications that send and receive SMS messages.
Prerequisites
To get started, you need a Plivo account — sign up with your work email address if you don’t have one already. If this is your first time using Plivo APIs, follow our instructions to set up a Go development environment.
Send an SMS message
Now you’re ready to start. Create a file called SendSMS.go and paste into it this code.
Replace the auth placeholders with actual values from the Plivo console. Replace the phone number placeholders with actual phone numbers in E.164 format (for example, +12025551234). In countries other than the US and Canada you can use a sender ID for the message source. You must have a Plivo phone number to send messages to the US or Canada; you can rent a Plivo number from Phone Numbers >Buy Numbers on the Plivo console or via the Numbers API. Save the file and run it.
Note: If you’re using a Plivo Trial account, you can send messages only to phone numbers that have been verified with Plivo. You can verify (sandbox) a number by going to the console’s Phone Numbers > Sandbox Numbers page.
Receive an SMS message
Of course sending messages is only half of the equation. Plivo supports receiving SMS text messages in many countries (see our SMS API coverage page and click on the countries you’re interested in). When someone sends an SMS message to a Plivo phone number, you can receive it on your server by setting a Message URL in your Plivo application. Plivo will send the message along with other parameters to your Message URL.
Create a file called receive_sms.go (or whatever name you like) and paste into it this code.
Save the file and run it.
You should then be able to see your basic server app in action on http://localhost:8080/receive_sms/.
That’s fine for testing, but it’s not much good if you can’t connect to the internet to receive incoming messages and handle callbacks. For that, we recommend using ngrok, which exposes local servers behind NATs and firewalls to the public internet over secure tunnels. Install it and run ngrok on the command line, specifying the port that hosts the application on which you want to receive messages.
Ngrok will display a forwarding link that you can use as a webhook to access your local server using the public network.
Now you can create an application to receive SMS messages (follow our Quickstart guide for details).
Conclusion
And that’s all there is to sending and receiving SMS messages using Plivo’s Go SDK. Don’t use Go? Don’t worry — we have SDKs for Java, Python, PHP, Node.js, Ruby, .NET Core, and .NET Framework.
Haven’t tried Plivo yet? Getting started is easy and only takes five minutes. Sign up today.

How to Send and Receive SMS Messages Using .NET and Plivo's Messaging API
Get started with Plivo’s SMS API and .NET to send and receive SMS text messages.
Once you’ve chosen Plivo to handle your company’s voice and messaging channels, it’s time to start integrating Plivo’s tools into your company’s applications. We make this process easy with a .NET SDK to help you out. Use it to write .NET applications that send and receive SMS messages.
In this guide, we’ll explain how to send and receive SMS messages using .NET. We'll walk you through how to up your account, write code snippets for sending messages, and receive responses through our SMS API. By the end, you'll be ready to leverage SMS communication for notifications, alerts, or even two-way interactions in .NET.
Prerequisites
Before you dive into the steps to set up Plivo’s SMS API with ASP.NET Core, make sure the following prerequisites are in place.
- A Plivo account— sign up with your work email address if you don’t have one already.
- Install .NET Framework 4.6 or higher
- Install the Plivo .NET SDK using Visual Studio
- Trigger an API request
- Set up a .NET Framework application
- Set up ngrok
The prerequisites listed above are part of the instructions to set up a .NET development environment. If this is your first time using Plivo APIs, follow our guide to set up your dev environment to send and receive SMS messages.
{{cta-style-1}}
Send an SMS message with ASP.NET Core
Now you’re ready to start. Open the file Program.cs in the CS project and paste into it this code.
Replace the auth placeholders with actual values from the Plivo console. Replace the phone number placeholders with actual phone numbers in E.164 format (for example, +12025551234). In countries other than the US and Canada you can use a sender ID for the message source. You must have a Plivo phone number to send messages to the US or Canada; you can rent a Plivo number from Phone Numbers >Buy Numbers on the Plivo console or via the Numbers API. Save the file and run it.
Note: If you’re using a Plivo Trial account, you can send messages only to phone numbers that have been verified with Plivo. You can verify (sandbox) a number by going to the console’s Phone Numbers > Sandbox Numbers page.
Receive an SMS message with ASP.NET Core MVC
Of course sending messages is only half of the equation. Plivo supports receiving SMS text messages in many countries (see our SMS API coverage page and click on the countries you’re interested in). When someone sends an SMS message to a Plivo phone number, you can receive it on your server by setting a Message URL in your Plivo application. Plivo will send the message along with other parameters to your Message URL.
Begin by setting up a .NET Core app. Create a new project directory.
Change to that directory and initialize the model-view-controller (MVC) architecture with the command
Change to the Controllers directory. Create a controller named ReceiveSmsController.cs and paste into it this code.
Before you can test the application, edit Properties/launchSettings.json and set the applicationUrl.
Then start the local server with the command
You should then be able to see your basic server app in action on http://localhost:5000/receivesms/.
That’s fine for testing, but it’s not much good if you can’t connect to the internet to receive incoming messages and handle callbacks. For that, we recommend using ngrok, which exposes local servers behind NATs and firewalls to the public internet over secure tunnels. Install it and run ngrok on the command line, specifying the port that hosts the application on which you want to receive messages.
Ngrok will display a forwarding link that you can use as a webhook to access your local server using the public network.
Now you can create an application to receive SMS messages (follow our Quickstart guide for details).
Why integrate Plivo’s SMS API with ASP.NET?
ASP.NET provides a strong foundation for integrating Plivo’s SMS API with your business tech stack. Many developers are already well-versed in C# and Visual Studio, making it faster and easier to leverage this framework for your web application.
Keeping your SMS logic within your ASP.NET application simplifies code management and maintenance. Everything is in one place. And, it scales well for handling high volumes of SMS traffic. Beyond SMS, ASP.NET allows you to integrate with other functionalities like email, databases, and user authentication, creating a powerful web application ecosystem.
Conclusion
That’s all there is to sending and receiving SMS messages using Plivo’s .NET Core SDK. Don’t use .NET Core? Don’t worry — we have SDKs for Java, Python, PHP, Node.js, Ruby, and Go.
Haven’t signed up for Plivo yet? Getting started is easy and only takes five minutes. Sign up today.

Use Adaptive Elements in Plivo’s Powerpack
Powerpack lets Plivo scale sending SMS messages and provides adaptive elements like Sticky Sender, Local Connect, Smart Encoding, and Automatic Fallback.
The most frequent question we hear from our SMS API customers is “How can I scale my application to send more messages?” and our answer is always the same and very simple — Powerpack.
What is Powerpack? You can think of it as a global routing and delivery system that spreads high-volume messaging traffic over several phone numbers for high delivery rates at the lowest possible cost.
Sending messages at scale and deciding which numbers to use can be a thankless and time-consuming task. To stay compliant, you have to be aware of things like carrier filtering, rate limits, and country-specific regulations.
Plivo has built-in logic that takes all of those things into consideration and automates the work for you, so you don’t need to devote any developer resources to the task. All you have to do is build a number pool for Powerpack, from which Plivo will distribute your outbound messages, and you can opt in to any of Powerpack’s automation features, including:
- Sticky Sender, which maintains the mapping of the “to and from” phone numbers so you send messages to the same customer from the same phone number every time, and ensure a single conversation thread.
- Local Connect, which allows you to match the country or area code with your customer’s phone number.
- Smart Encoding, which detects Unicode characters and replaces them with equivalent GSM-encoded characters when possible, saving you money.
- Automatic Fallback, which gives you the flexibility to set priority parameters by phone number type and assign some as fallback numbers, in case messages fail to be delivered. For example, if a customer is concerned with cost optimization, they can set toll-free numbers as their priority numbers, and assign long codes as automatic fallback numbers, to be used only in case of network outages or end user restrictions. If a customer is more concerned with deliverability, they can prioritize short codes and assign toll-free numbers or long codes as automatic fallback numbers.
Powerpack intelligently manages your numbers and ensures that your messages are delivered.
But what if you want to go deeper and specify rules for messages that are being terminated in the recipient’s carrier network?
In recent months, we’ve experienced a huge shift in the messaging landscape as major US carriers roll out their 10DLC routes to support higher messaging speeds and better deliverability for application-to-person (A2P) communication. And while 10DLC comes with a number of benefits, including higher SMS message volumes, lower costs than short codes, and better deliverability, 10DLC routes also incur surcharges, on top of the existing termination fees. Businesses may find it more cost-effective to send messages on toll-free numbers (source numbers that incur no surcharge in the AT&T network, for example), and may want to prioritize toll-free numbers whenever traffic is being terminated to users who have AT&T.
Similarly, the Verizon network issues surcharges for A2P messages on both long codes and toll-free numbers. The costs for each are similar, so a business might take other things into consideration, such as throughput rates and deliverability. 10DLC routes for long codes are sanctioned by mobile carriers and therefore are not subject to the same strict filtering as toll-free numbers, meaning they have better deliverability. In this case, a business might set long codes as Priority 1 under the Verizon network in their Powerpack. These kinds of adaptive elements means that Plivo customers have a ton more flexibility when configuring their Powerpack, and can tailor it to their specific use cases and business needs.

We recommend that all Plivo customers leverage Powerpack to reach large lists of users with just a single API request. Want to learn more? You can get the full story on how to configure a Powerpack, send outbound messages, specify priorities by carrier, and more in our Powerpack documentation.
Haven’t tried Plivo yet? Getting started is easy and takes only a few minutes! Sign up today.

How to Make and Receive Phone Calls Using PHLO and Node.js
How to make and receive outgoing and incoming voice calls using Node.js with the Plivo Voice API.
Your company has settled on Plivo to handle its voice and messaging communications, and now it’s your job to start integrating Plivo into your company’s applications. Don’t worry — Plivo has an SDK to help you out. Let’s see how to make outbound calls and handle incoming calls through PHLO.
Install the Plivo SDK
We’ll presume you already have your Node.js environment set up. Change to the directory into which you want to install the Plivo Node.js SDK and run
Find your Auth ID and Auth Token
You have to have proper credentials before you can use the Plivo API. We provide an Auth ID and Auth Token in the Account section at the top of the overview page of the Plivo console.
Choose a phone number
You need an voice-enabled Plivo phone number if you want to receive incoming calls. Check the Numbers screen of the Plivo console to see what numbers you have available. You can also rent numbers from this screen.
Use PHLO to set up an outbound call
Now you can turn to PHLO, Plivo’s visual workflow design studio, to set up the workflow for an outbound call. Click on the PHLO icon on the left-side navigation bar, then on Create New PHLO. In the window that pops up, click Build My Own.
Let’s start with a very simple workflow. From the list of components on the left side, drag and drop the Initiate Call component onto the canvas, then connect the Start node to the Initiate Call node using the API Request trigger state.
Now you can add configuration information for the call in the right pane. Valid phone numbers begin with a plus sign and a country code. Add a caller ID number in the From field and a destination number in the To field, then click Validate to save the configuration.
PHLO lets you use variables for From and To values, but we’re keeping it simple for this example.
Now drag the Play Audio component onto the canvas. Connect the Initiate Call node to Play Audio using the Answered trigger state. In the Configuration panel, enter the text you want to play for the call recipient, then click Validate.
That’s all we’re going to do for now — we told you it was simple. Give the PHLO a name by clicking on the pencil icon in the upper left, then click the Save button in the upper right.
Run the PHLO to make a call
Now you can trigger the PHLO and test it out. Copy the PHLO ID from the end of the URL of the workflow you just created. You’re also going to need your Auth ID and Auth Token. Create a file — let’s call it TriggerPhlo.js — and paste this code into it:
Substitute actual values for <auth_id>, <auth_token>, and <PHLO_ID>. Save the file and run it with the commandBoom — you’ve made an outbound call.
Set up inbound calls
Of course outbound calls are only half of the equation. Plivo supports inbound calls as well. To see how, let’s create another PHLO and again specify Build My Own. This time, drag the Play Audio component onto the canvas and connect the Start node to it using the Incoming Call trigger state. In the Configuration panel, enter some text to speak to the caller when the call is answered, then click Validate to save the configuration. Give this PHLO a name, then click Save.
Before you can receive a call using this PHLO, you have to assign it to a Plivo number. Go back to the Plivo console and click on Phone Numbers on the left nav bar. From the list of Your Numbers, click on the number you want to use. On the next screen, from the Application Type dropdown, choose PHLO. From the PHLO Name dropdown, choose the PHLO you just created. Then click Update Number at the bottom of the screen.
Guess what? You’re done! You don’t have to run a program for this PHLO to work. Just call the Plivo number you specified and you should hear the message you configured read by Plivo’s text-to-speech processor.
Conclusion
And that’s all there is to sending and receiving voice calls using Plivo’s Node.js SDK. Don’t use Node.js? Don’t worry — we have SDKs for Java, Python, PHP, Ruby, .NET Core, .NET Framework, and Go.
Haven’t tried Plivo yet? Getting started takes only five minutes. Sign up today.
It’s easy to get started. Sign up for free.
Create your account and receive trial credits or get in touch with us.
