


Plivo’s PHLO visual workflow builder lets you quickly create and configure a SIP trunk call forwarding system for your business. You can migrate your existing SIP trunk hosted voice application to PHLO, which then forwards your Plivo number’s incoming calls to an IP PBX and SIP endpoint.
Configure your inbound SIP trunk
Plivo provides SIP trunk configuration instructions for the most popular SIP trunking platforms, including Freeswitch, Asterisk, FreePBX, 3CX, and FusionPBX.
Prerequisites
To get started, you need a Plivo account — sign up with your work email address if you don’t have one already. To receive incoming calls, you must have a voice-enabled Plivo phone number. You can rent numbers from the Numbers page of the Plivo console, or by using the Numbers API.
Create a PHLO to forward inbound calls
To forward an incoming call, you can create and deploy a PHLO with a few clicks on the PHLO canvas.

- On the side navigation bar, click PHLO. The PHLO page will appear and display your existing PHLOs, if any exist. If this is your first PHLO, then the PHLO page will be empty.
- Click Create New PHLO to build a new PHLO.
- In the Choose your use case window, choose the Call Forwarding use case. The PHLO canvas will appear with a prebuilt template for the Call Forwarding use case.
- Configure the Call Forward node.
- Once you’ve configured the node, click Validate to save the configurations.
- After you complete the configuration, provide a name for your PHLO and click Save.
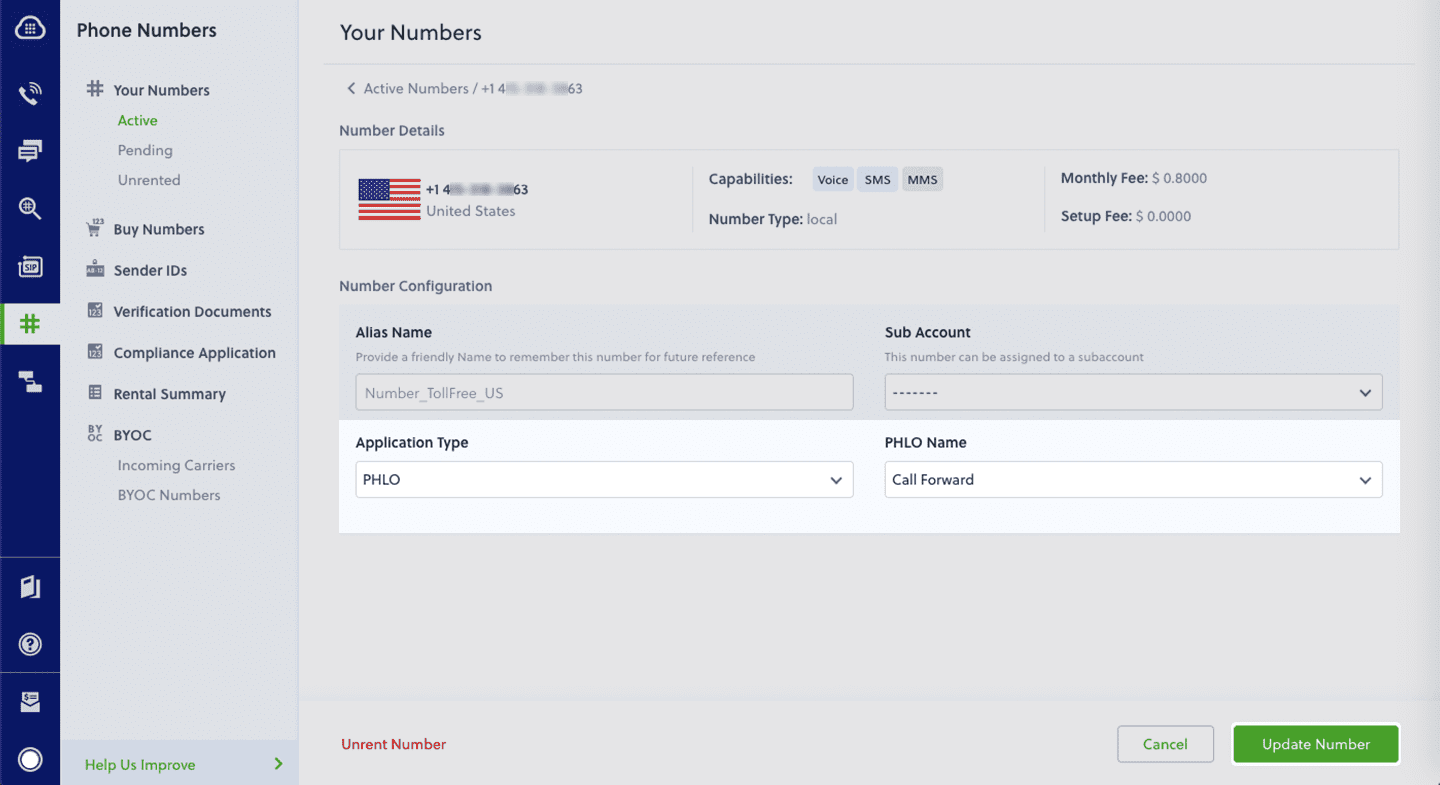
Assign the PHLO to a Plivo number to forward incoming calls
Once you’ve created and configured your PHLO, assign your PHLO to a Plivo number.
- Log in to the Plivo console.
- On the Product Navigation bar, click Phone Numbers.
- On the Numbers page, under Your Numbers, click the phone number you want to use for the PHLO.
- In the Number Configuration window, select PHLO from the Application Type list.
- From the PHLO Name list, select the PHLO you want to use with the phone number, and then click Update Number.
Test
You can now make a call to your Plivo phone number and see how the inbound call is forwarded to the list of IP PBXes and endpoint specified in the PHLO.
For more information about creating a PHLO app, see the PHLO User Guide.
For information on components and their variables, see the PHLO Components Library.
Haven’t tried Plivo yet? Getting started is easy and only takes minutes. Sign up today.


