


You can use voicemail to capture a caller’s message if a call recipient is unavailable. You can create and deploy a PHLO workflow to implement voicemail with a few clicks on the PHLO canvas.
Prerequisites
To get started, you need a Plivo account — sign up with your work email address if you don’t have one already. To receive incoming calls, you must have a voice-enabled Plivo phone number. You can rent numbers from the Numbers page of the Plivo console, or by using the Numbers API.
Create the PHLO
To create a PHLO, visit the PHLO page of the Plivo console. If this is your first PHLO, the PHLO page will be empty.
- Click CREATE NEW PHLO.
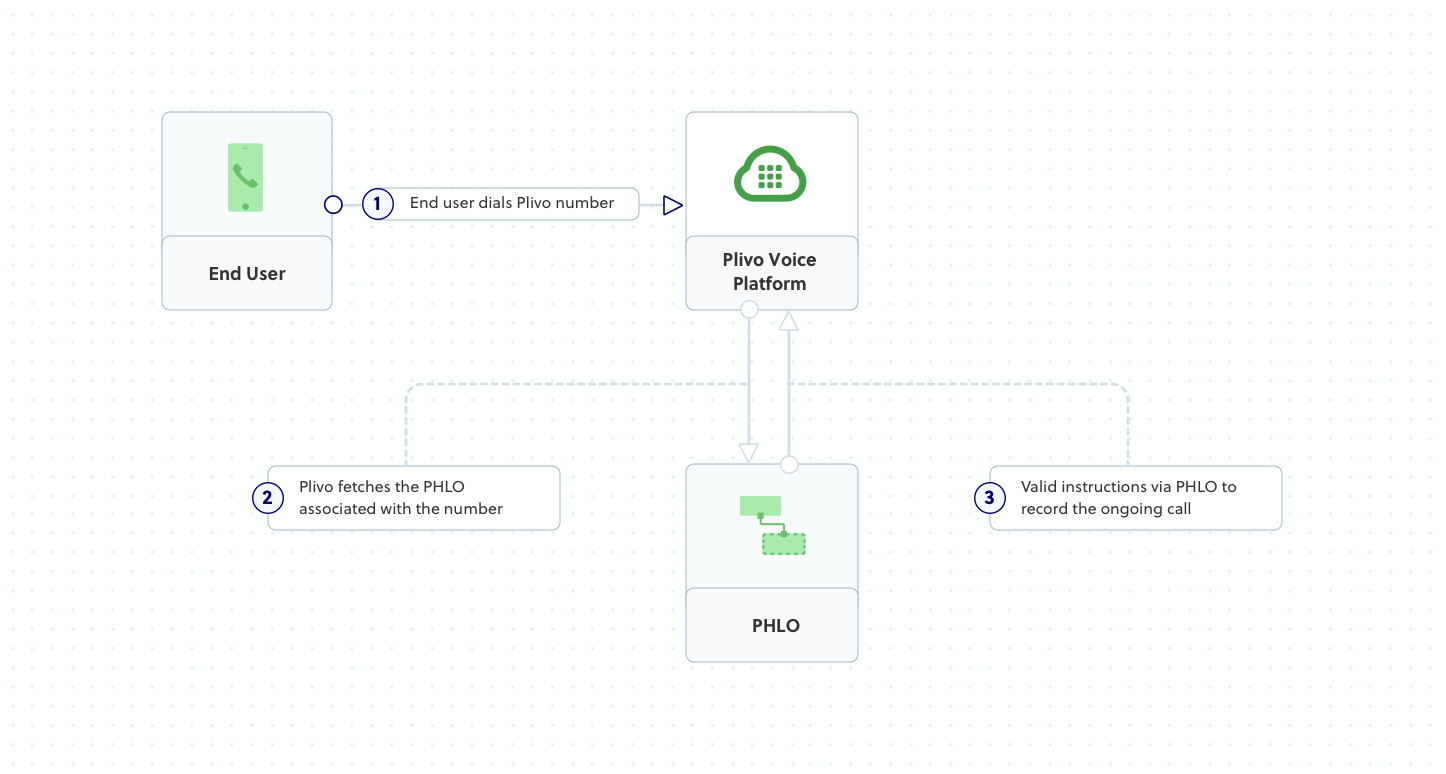
- In the Choose your use case pop-up, click Build my own. The PHLO canvas will appear with the Start node.Note: The Start node is the starting point of any PHLO. It lets you trigger a PHLO to start upon one of three actions: incoming SMS message, incoming call, or API request.
- Click the Start node to open the Configuration tab, then enter from and to as keys in the API Request section. To keep the PHLO dynamic, don‘t enter values for the variables.
- Once you’ve configured the node, save the configuration by clicking Validate. Do the same for each node as you go along.
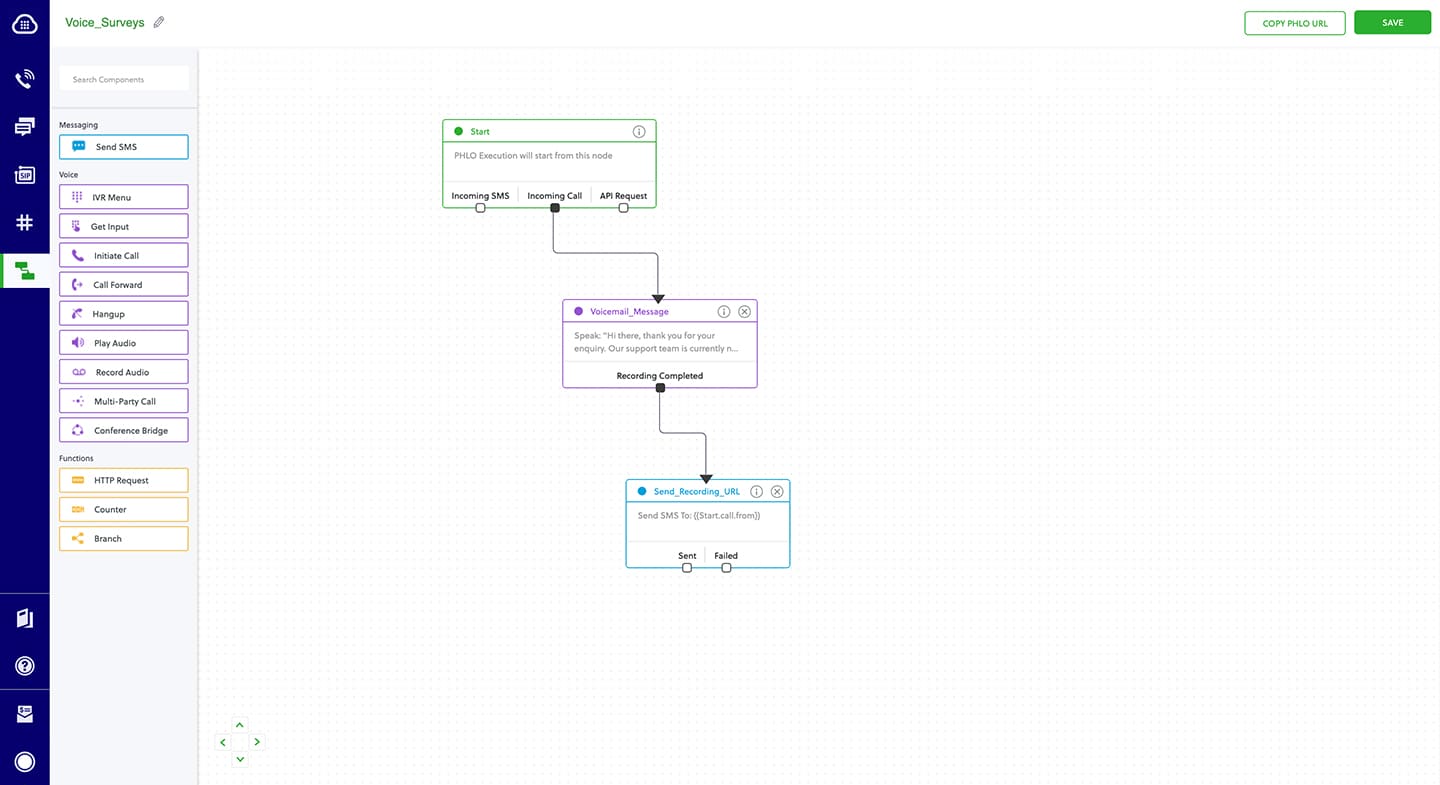
- From the list of components on the left side, drag and drop the Record Audio component onto the canvas. When a component is placed on the canvas it becomes a node. In its Configuration tab, give the node a descriptive name, such as Voicemail_Message, and enter text for a message you want to play to callers.
- Draw a line to connect the Start node‘s Incoming Call trigger state to the Record Audio node.
- Once a message is recorded, send the URL of the recording to a responsible party. To do that, drag and drop the Send Message component into the canvas, and rename it Send_Recording_URL.
- In its Configuration tab, enter variables for the From and To fields. Enter two curly brackets to view all available variables, and choose the appropriate ones. PHLO will get the number from the key/value pairs set in the Start node. In the Message field, enter a message that provides context for the voicemail recipient. The message can be static or dynamic or a combination of the two.
- Give the PHLO a name by clicking in the upper left, then click Save.
Your complete PHLO should look like this.
Assign the PHLO to a Plivo number
Once you‘ve created and configured your PHLO, assign it to a Plivo number.
- On the Numbers page of the console, under Your Numbers, click the phone number you want to use for the PHLO.
- In the Number Configuration box, select PHLO from the Application Type drop-down.
- From the PHLO Name drop-down, select the PHLO you want to use with the phone number, then click Update Number.

Test
You can now call your Plivo phone number and see how the voicemail PHLO works.
For more information about creating a PHLO application, see the PHLO Getting Started guide. For information on components and their variables, see the PHLO Components Library.
Haven’t tried Plivo yet? Getting started is easy and only takes minutes. Sign up today.


