


A virtual assistant can help your business if you have clients who call your phone number. Interactive voice response (IVR) helps you to automate call reception by routing callers to the most appropriate department or the agent most qualified to meet their needs. Among its many advantages, IVR can provide increased operational efficiency, a stronger brand image, and better customer insights.
A voice-controlled virtual assistant is one step ahead of the legacy Touch-Tone/DTMF controlled one because of the flexibility it allows end-users. They can just speak into their phone’s microphone to provide input to control the call.
Building a voice-controlled virtual assistant using Plivo’s automatic speech recognition (ASR) feature in Java using Spring Boot is simple. This guide shows you how to set up a voice-controlled IVR phone tree to a Plivo number and manage the call flow when the call reaches the Plivo voice platform. To see how to do this, we’ll build a spring boot application to receive an incoming call and use the GetInput XML element to capture speech input and implement a simple IVR phone system.
Prerequisites
Before you get started, you’ll need:
- A Plivo account — sign up for one for free if you don’t have one already.
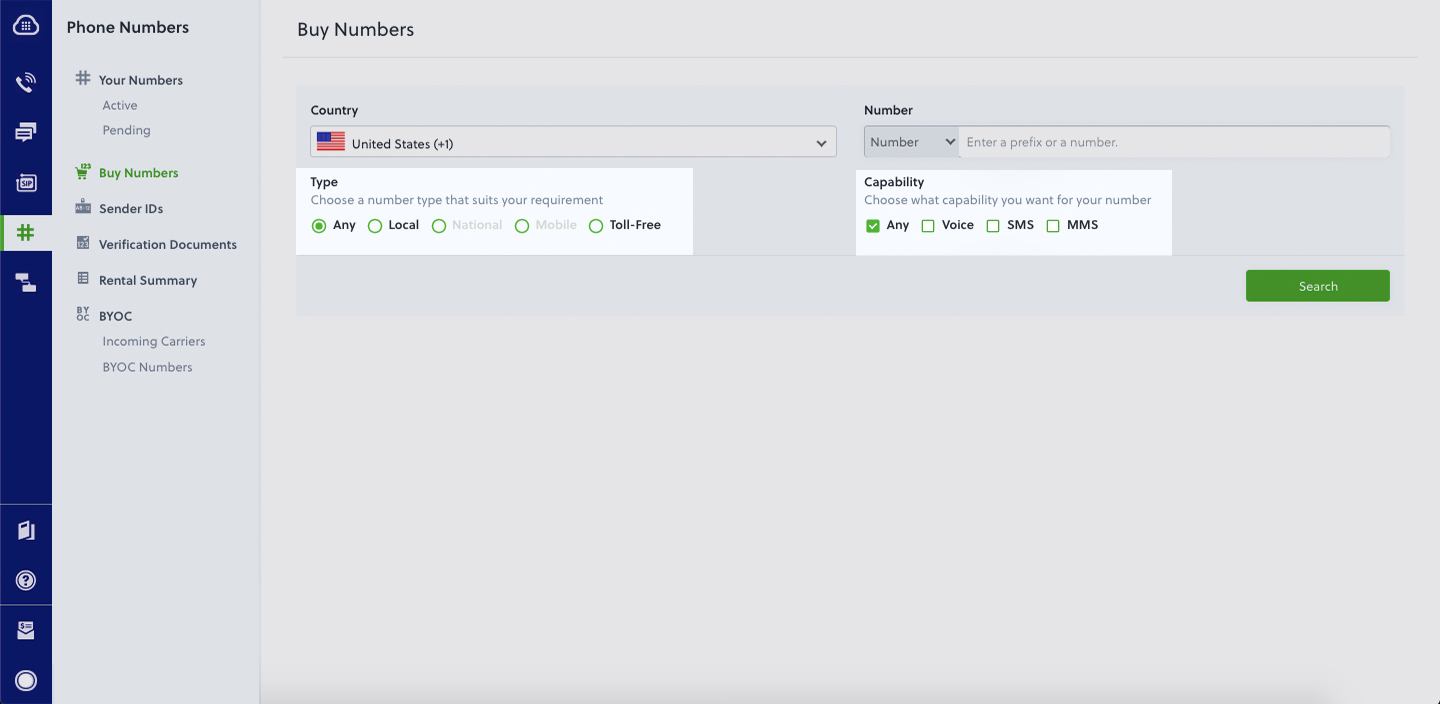
- A voice-enabled Plivo phone number if you want to receive incoming calls. To search for and buy a number, go to Phone Numbers > Buy Numbers on the Plivo console.
- Sprint Boot and Plivo Java packages — use the Spring Initializr to create a demo project with boilerplate code.
- ngrok — a utility that exposes your local development server to the internet over secure tunnels.
{{cta-style-1}}
How it works
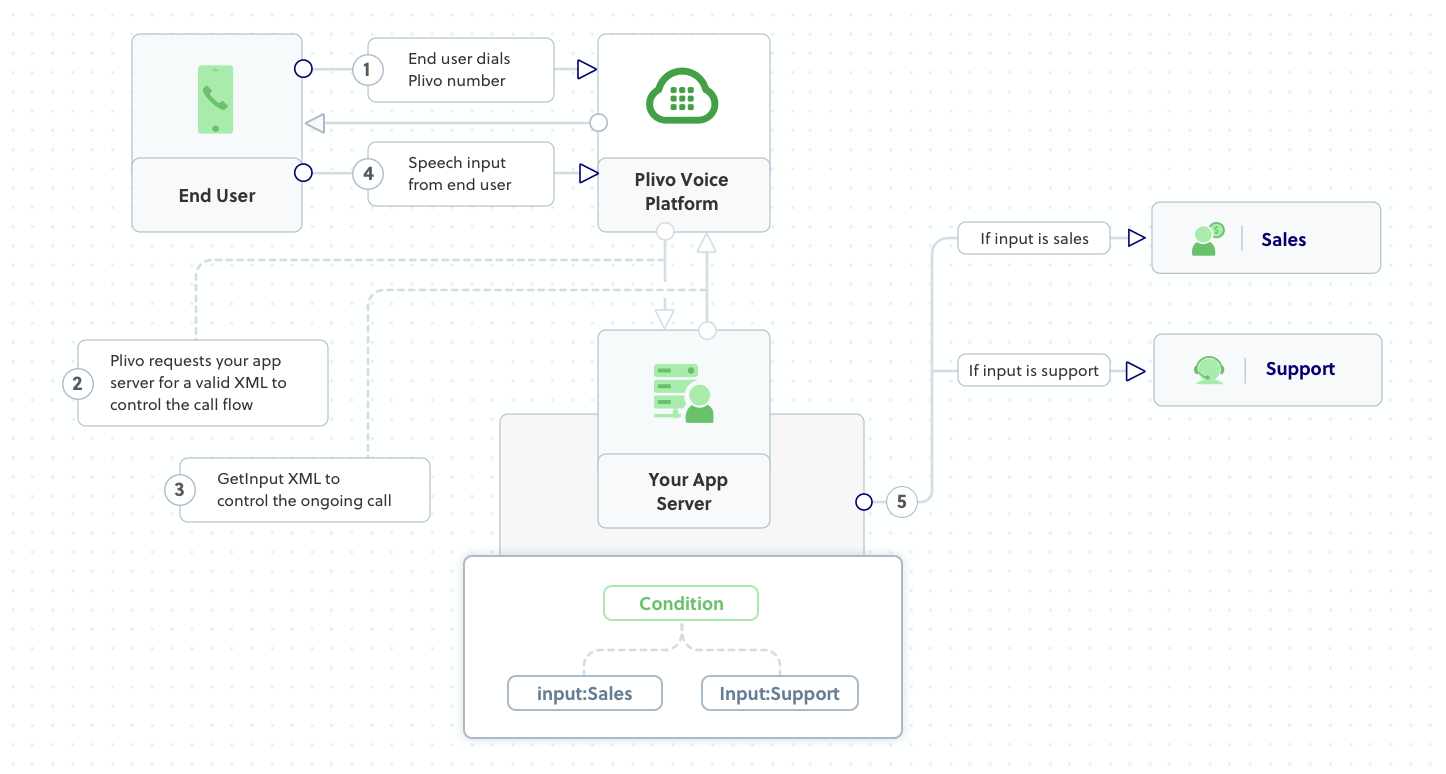
Create a spring boot application to create a voice-controlled virtual assistant
Once you’ve created the Spring Boot application using Spring Initializr, you can add the Plivo Java SDK using Maven or Gradle, or Groovy as per the interface selected. Update the Java application in the created project to handle incoming calls on a Plivo number. To handle an incoming call, you need to return an XML document from the URL configured as the Answer URL in the application assigned to the Plivo number. The Java SDK can manage the XML document generation, and you can use the GetInput XML element to capture speech inputs and implement a simple IVR phone system. Use this code:
Test the code locally
Save the file and run the application. You should see your basic server application in action on http://localhost:8080/virtual_assistant/.
Expose the local server to the internet using ngrok
Once you see the application working locally, the next step is to connect the application to the internet to return the XML document to process the incoming call. For that, we recommend using ngrok, which exposes local servers behind NATs and firewalls to the public internet over secure tunnels.
Install it and run ngrok on the command line, specifying the port that hosts the application on which you want to receive calls (8080 in this case, as our local spring boot application is running there):
Ngrok will display a forwarding link that you can use as a webhook to access your local server over the public network.
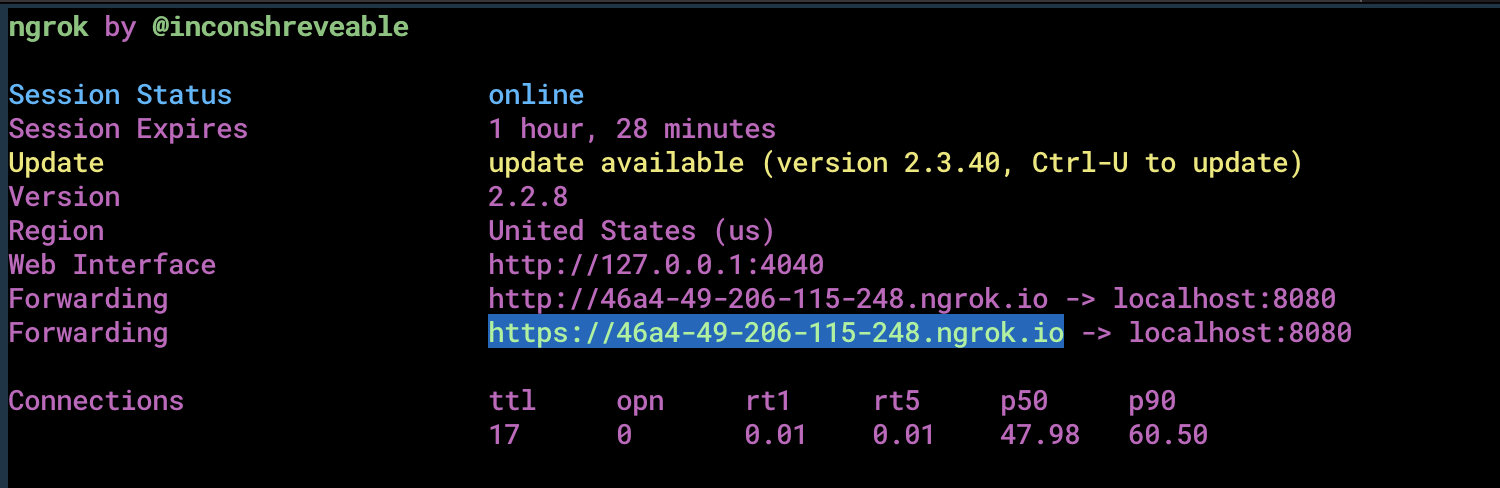
Test the link by opening the ngrok URL(https://46a4-49-206-115-248.ngrok.io/virtual_assistant/) in a browser or HTTPie to check the XML response from the ngrok URL.

Connect the spring boot application to a Plivo number
The final step is to configure the application as a Plivo voice application and assign it to a Plivo number on which you want to activate the voice-controlled virtual assistant.
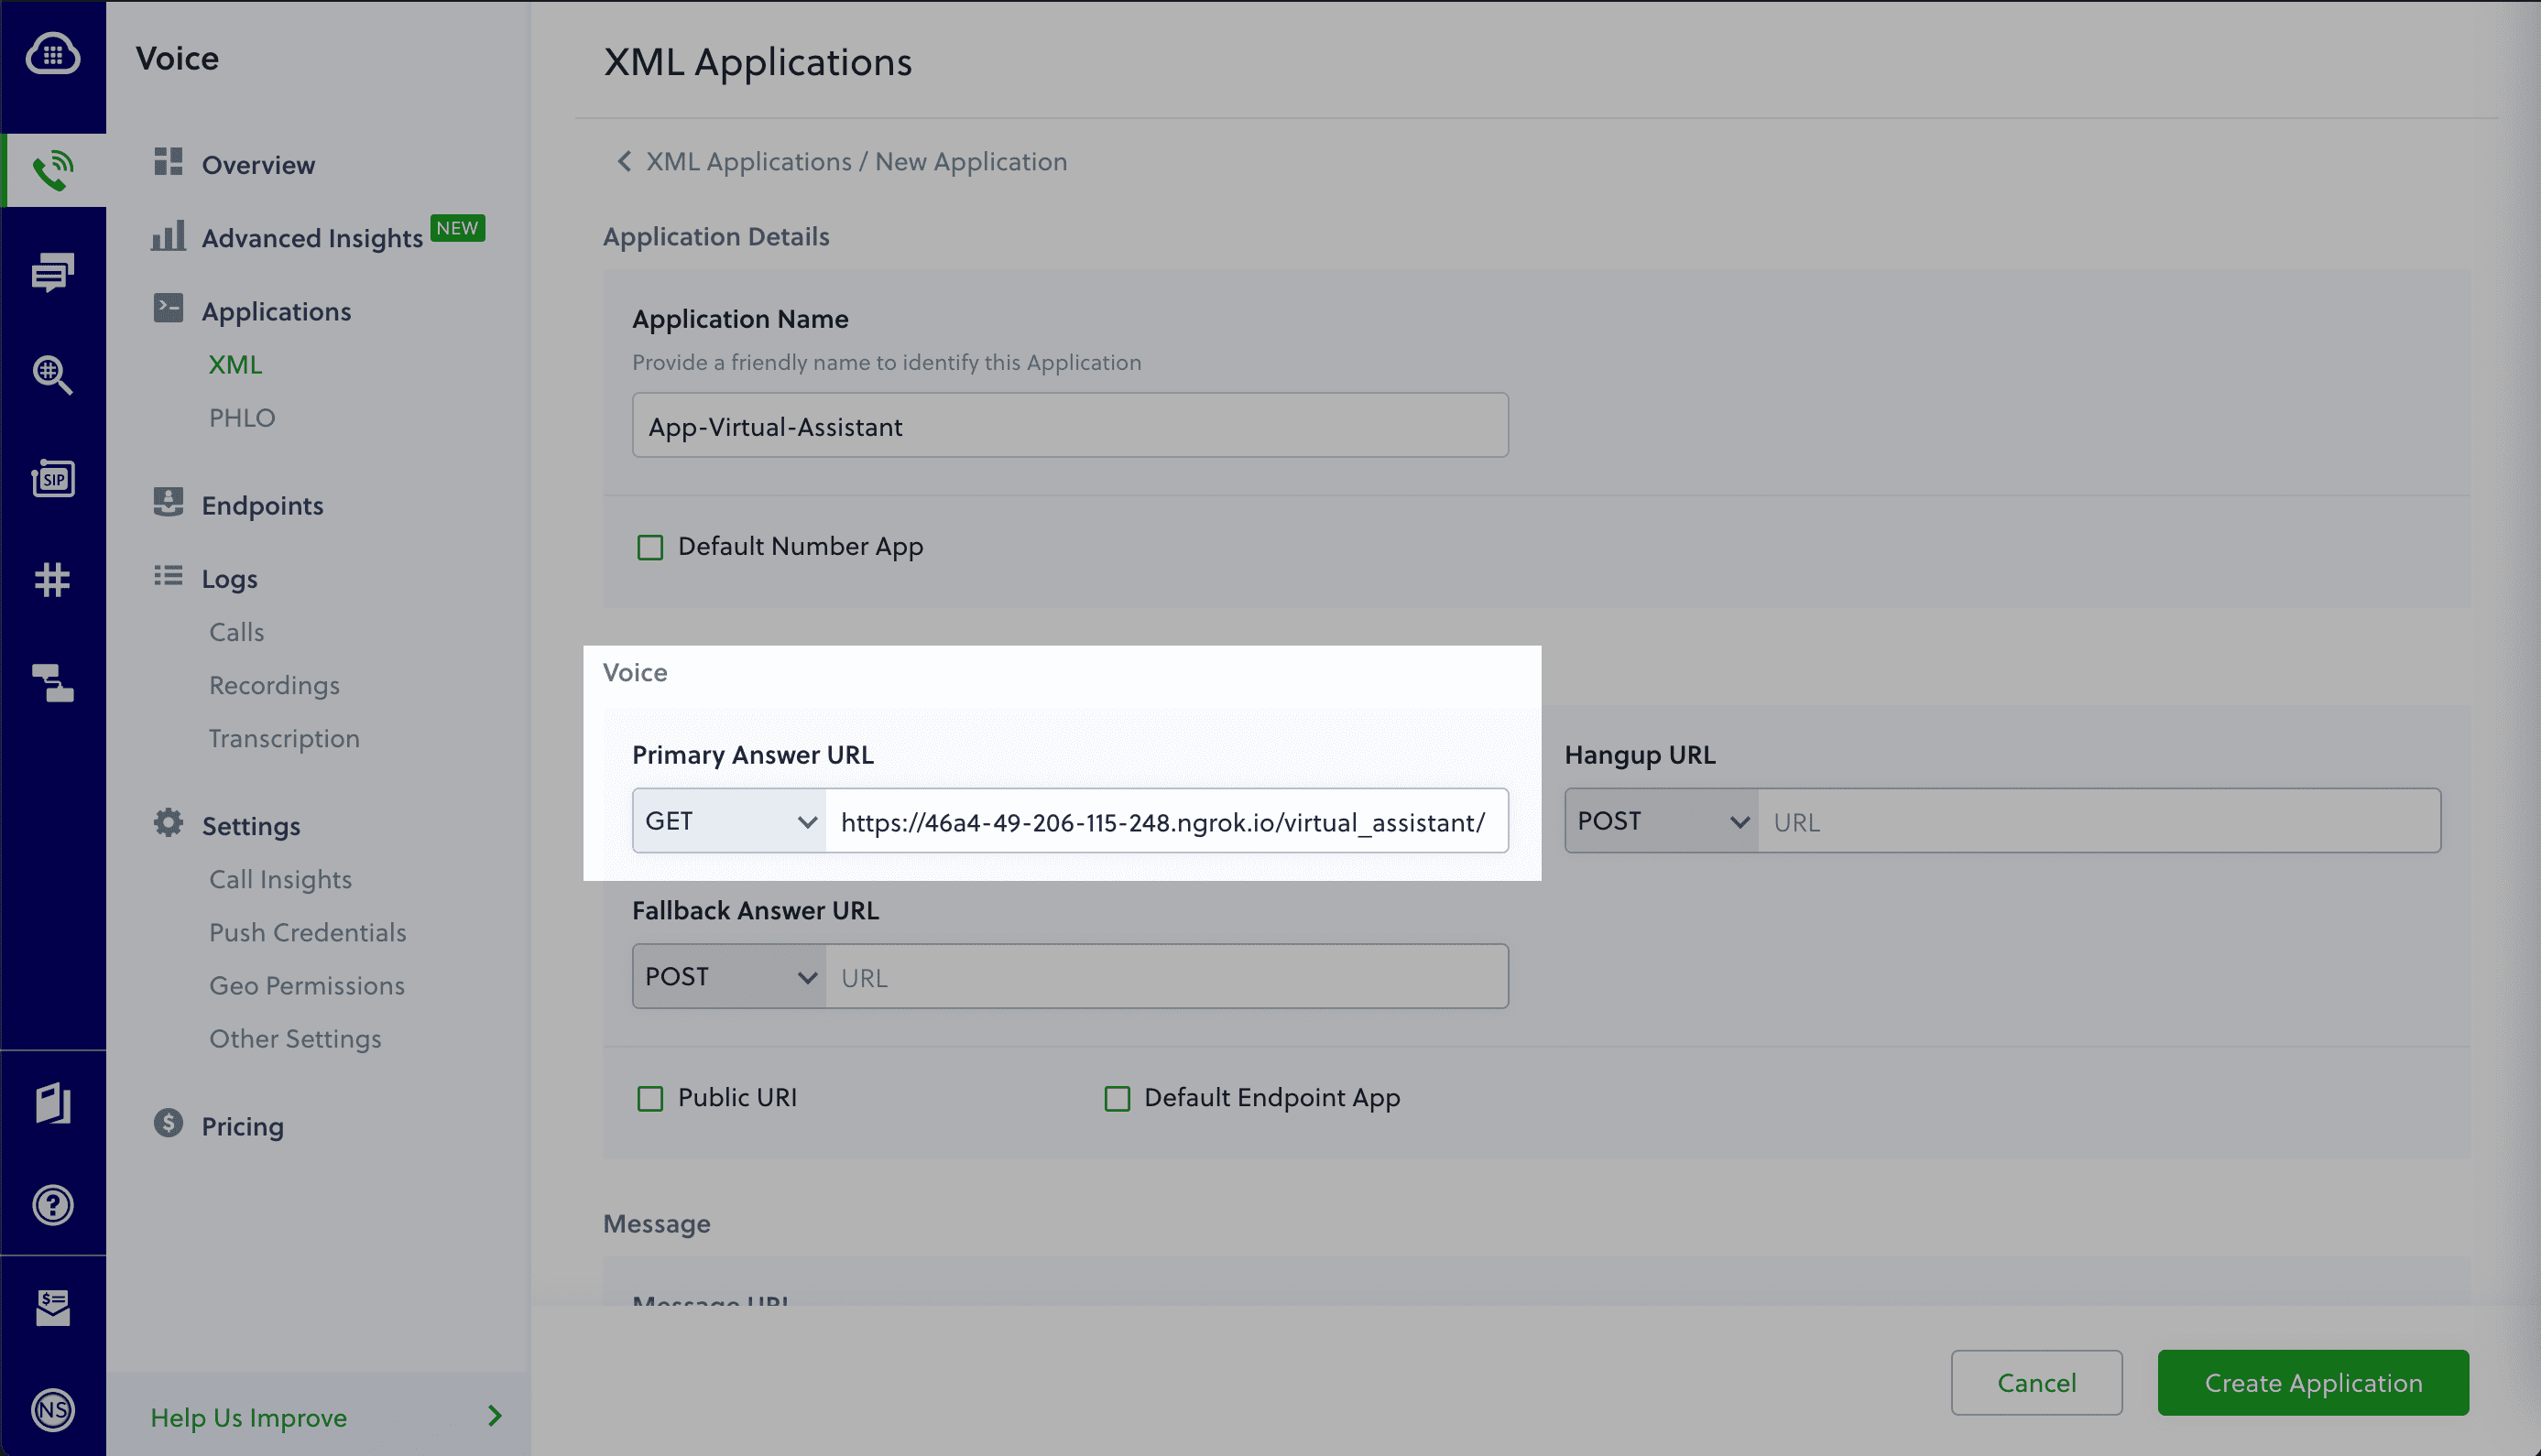
Go to the Plivo console and navigate to Voice > Applications > XML, then click on the Add New Application button in the upper right.
Provide a friendly name for the application — we used “App-Virtual-Assistant” — and configure the ngrok URL https://46a4-49-206-115-248.ngrok.io/virtual_assistant/ as the Answer URL. Select the HTTP verb as POST, then click Create Application.
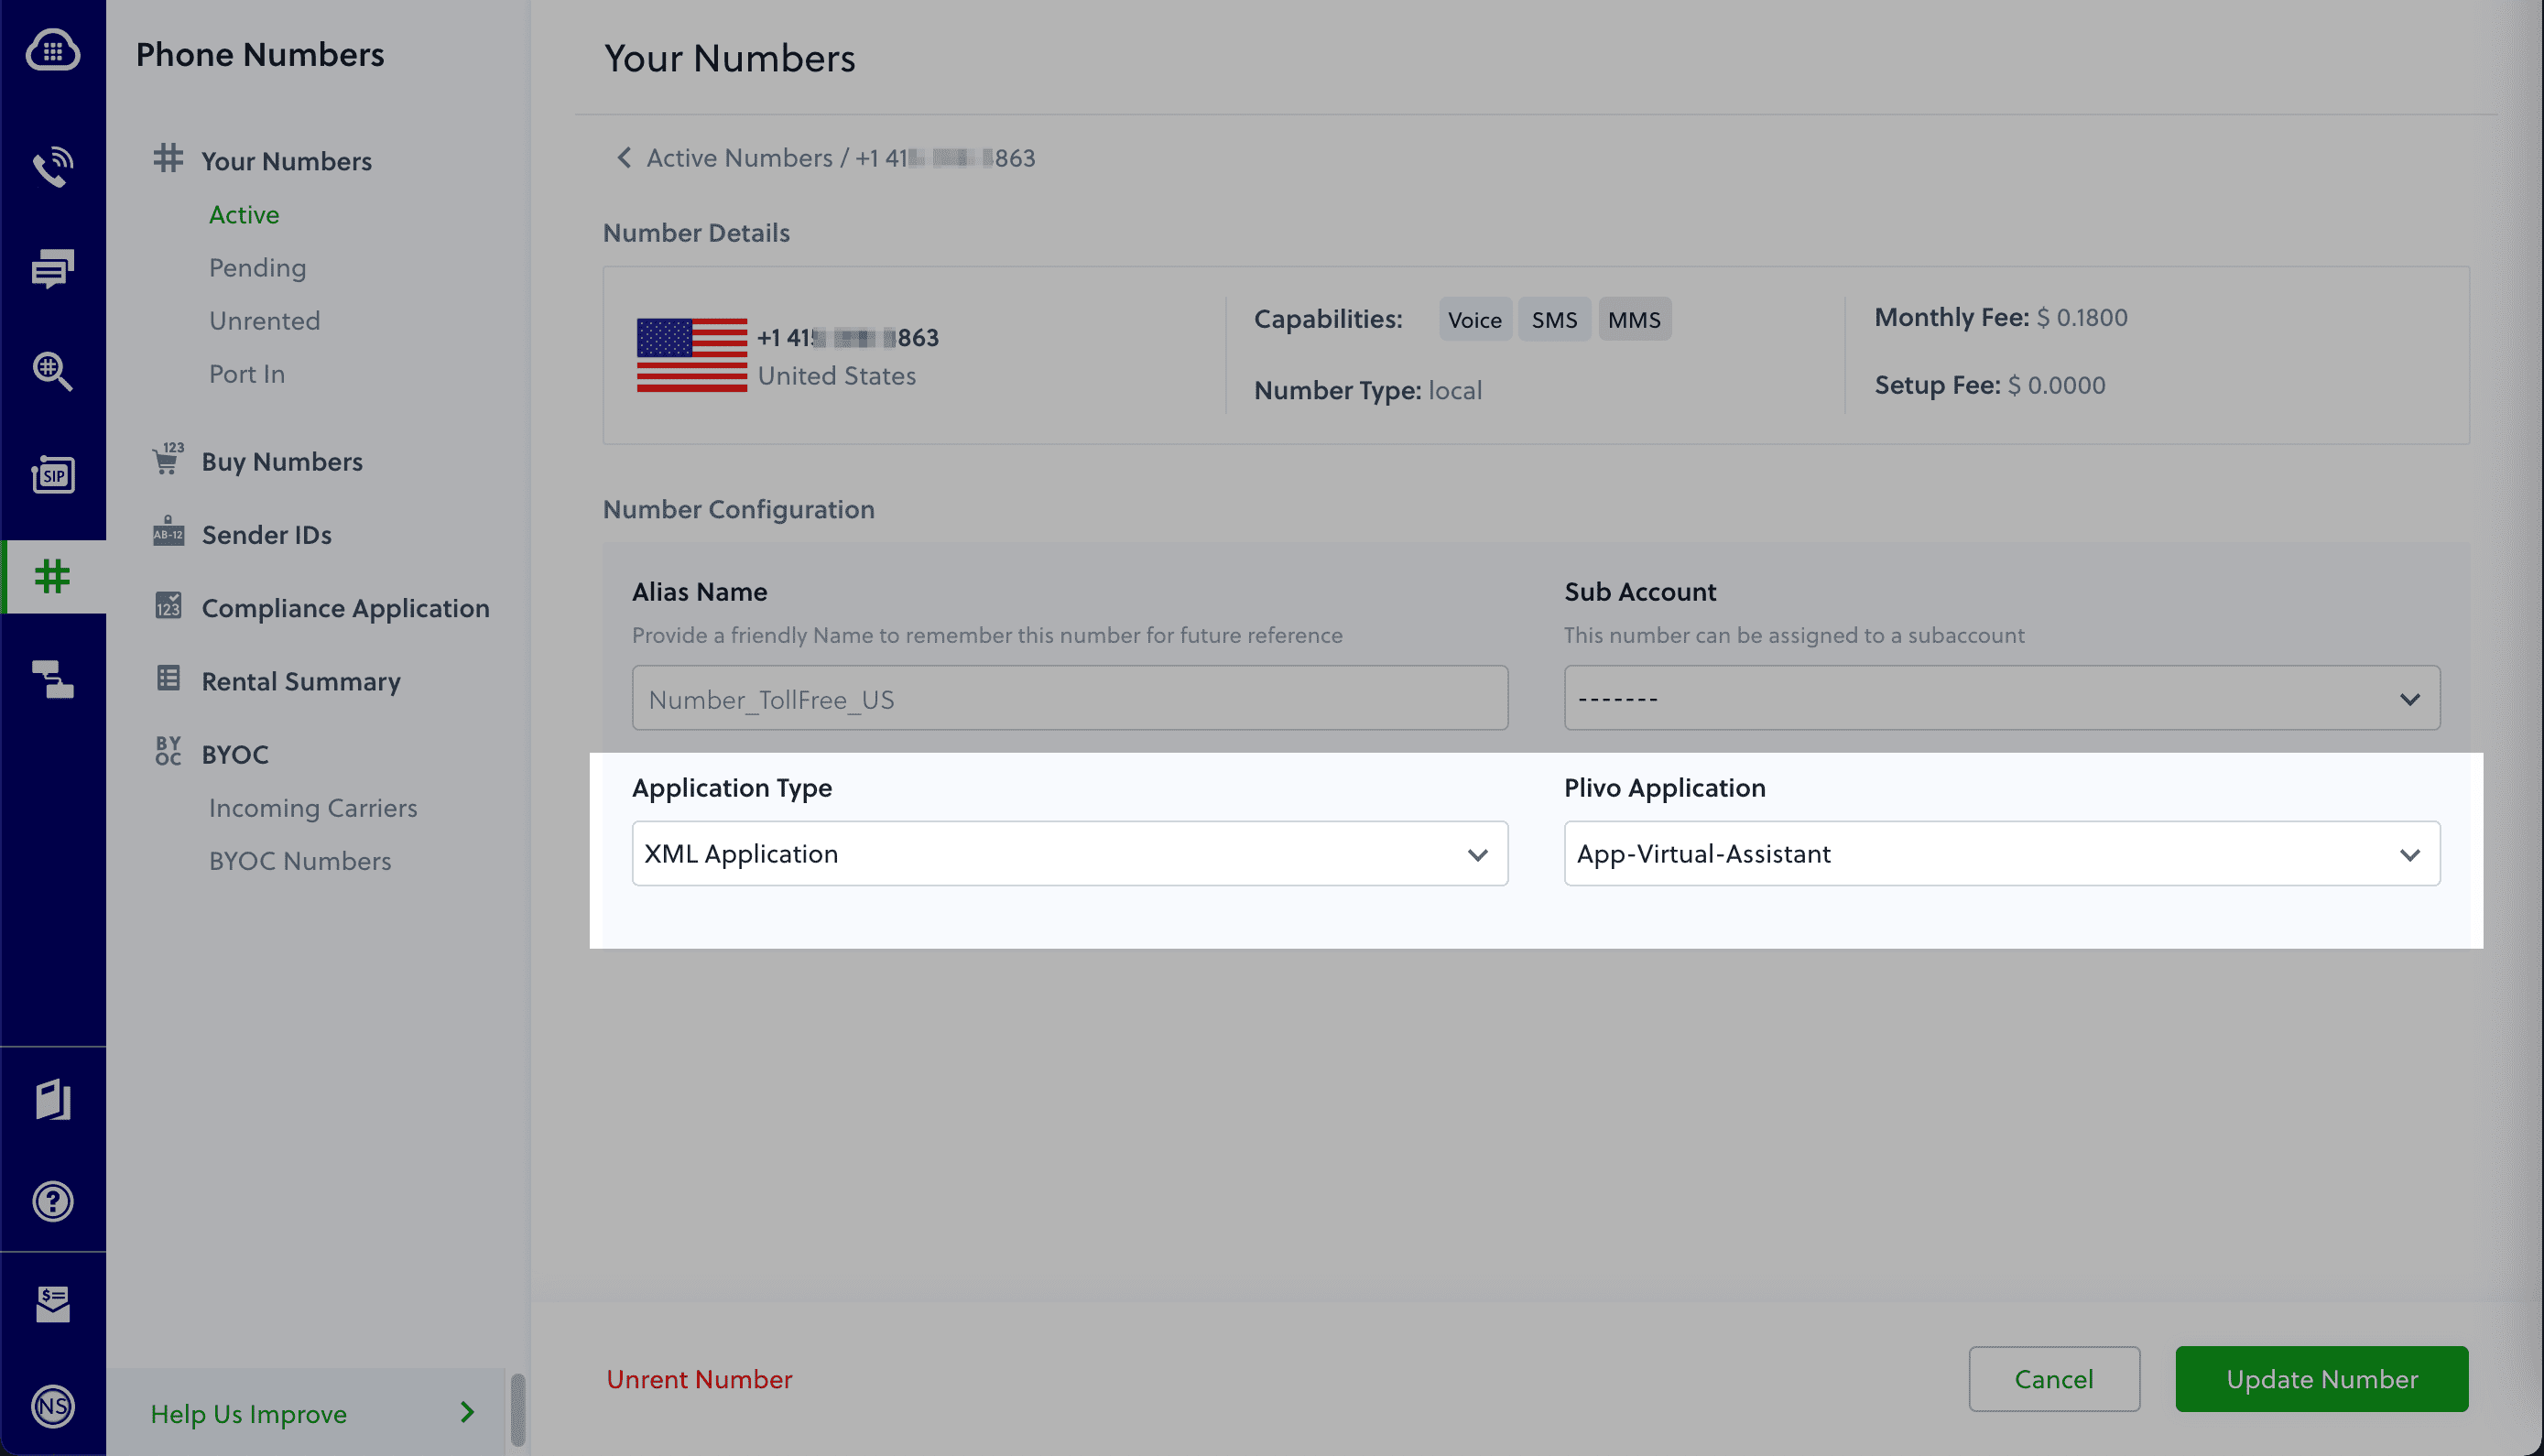
Now go to Phone Numbers > Your Numbers and click on the number to which you want to assign the application. From the Plivo Application drop-down, choose the voice application you just created. Finally, click Update Number.
Test the application
Make a phone call to the Plivo number you selected. You should see that the VirtualAssistant spring boot application automatically routes the call to the Sales and Support departments based on the speech inputs received on the call.
And that’s how simple it is to set up a voice-controlled virtual assistant on a Plivo number and handle it using XML documents using Plivo’s Plivo’s Java SDK and a spring boot application. You can implement other use cases on the Plivo Voice platform, such as phone system IVR, call forwarding, and number masking, as your business requires.
Haven’t tried Plivo yet? Getting started is easy and only takes five minutes. Sign up today.


